Sometimes you need to capture your experiences on your laptop display. Whether you're making a tutorial, capturing a persistent problem with your device, or recording video game footage, screen recording on your laptop is a great way to get the job done. The question is, how do you do it?
While setting up a camcorder and a tripod might come to mind, this is less than ideal. You're going to need software that can record your screen without severe drops in your computer's performance. Let's talk about how to record your laptop screen and what software you can use to do so. I'll discuss solutions for both Windows 10 PCs and MacBooks.
Open Broadcaster Software (OBS): The Universal Solution
One of the most versatile laptop screen recording programs out there for both Windows 10 PCs and MacOS computers is Open Broadcaster Software (OBS). This is a free program that was primarily designed to enable users to stream content over the Internet, but it can also capture videos in several formats and resolutions.
OBS might look tricky at first, but once you get it working, it can be a powerful tool for more than just recording your screen. For example, OBS can accept video and audio input from other sources, like your webcam and microphone, as well as any external video devices you have.
How To Screen Record On Laptop With OBS
To record your laptop screen with OBS, follow these steps:
-
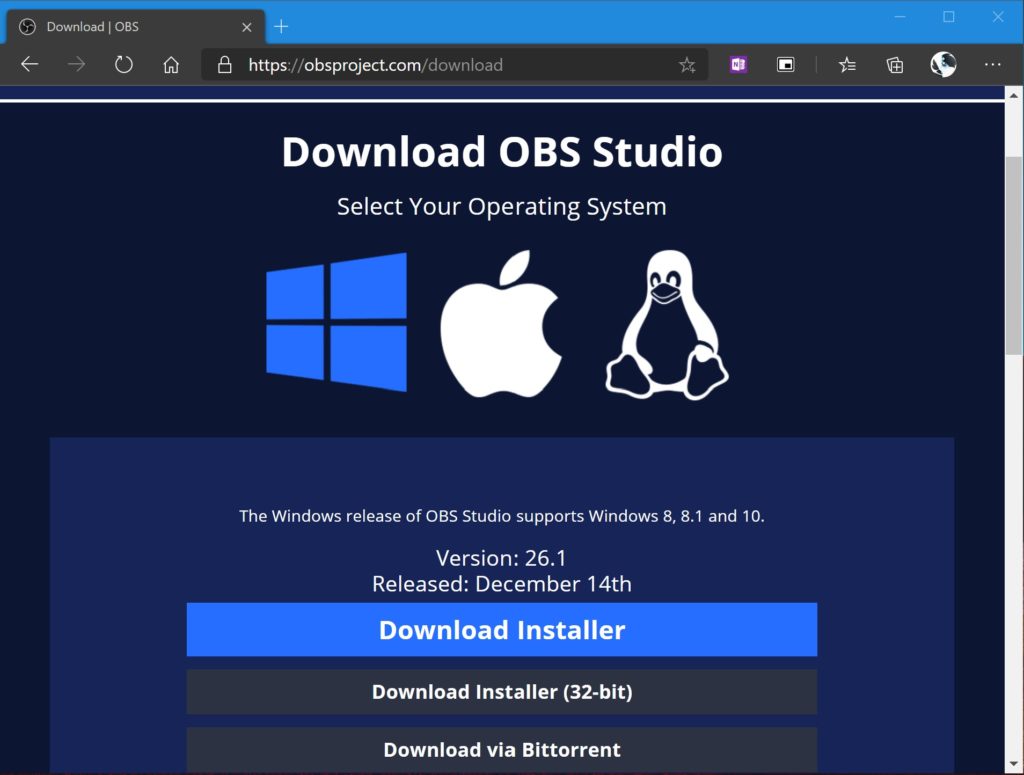
- Download and install OBS for PC or Mac.
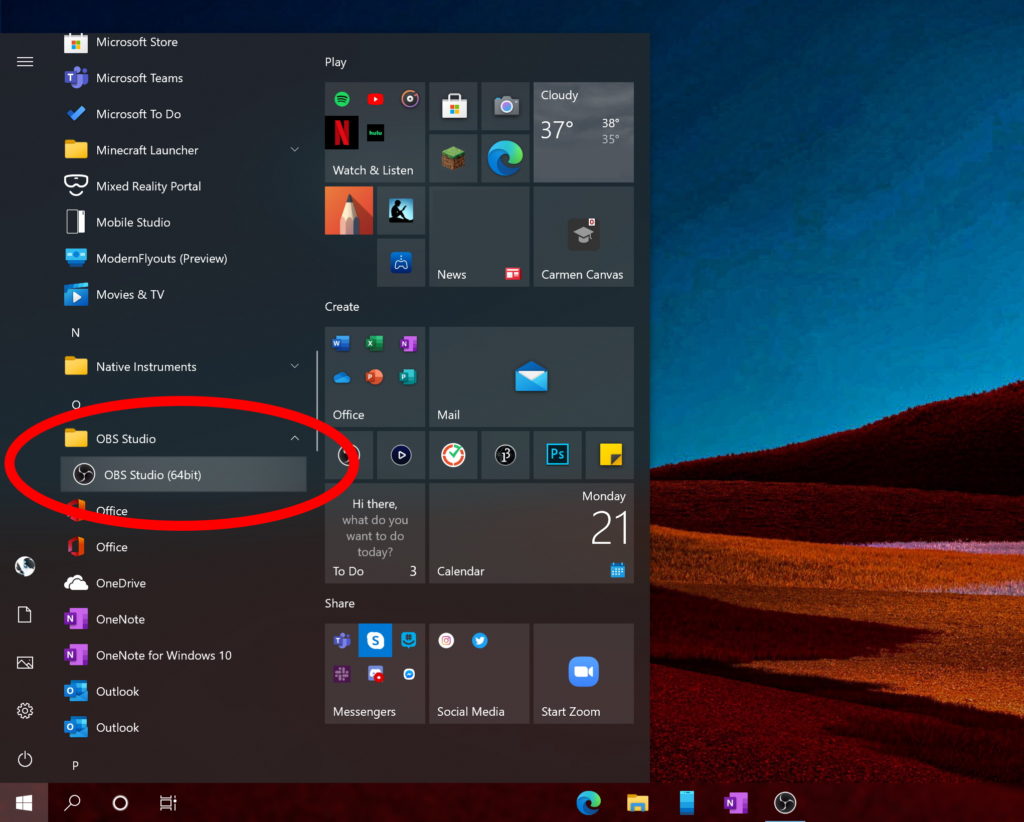
- Open OBS.
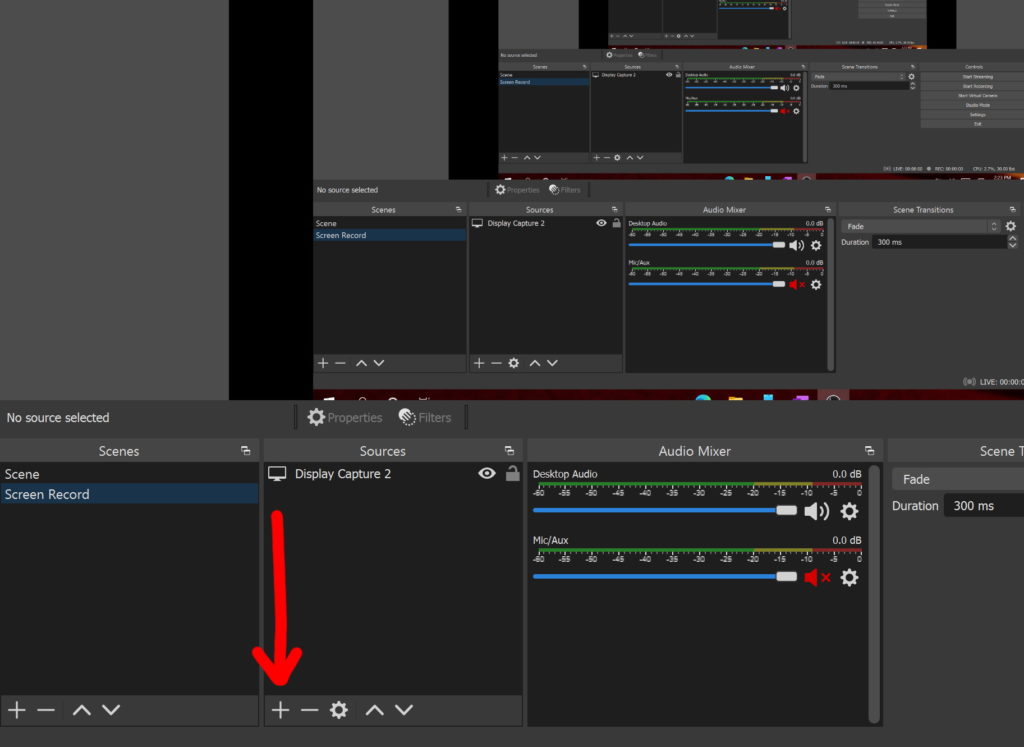
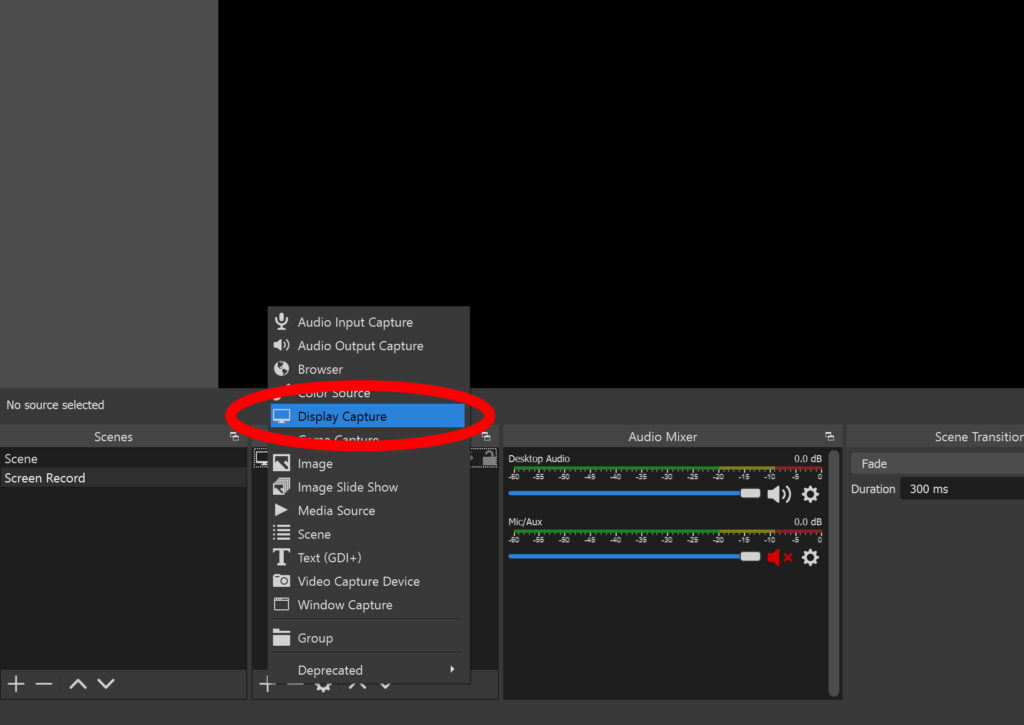
- In the lower-left, click the plus (+) under Sources to add a new video source.
- Select Display Capture, then click OK.
- Now, you should see an infinite mirror effect, if you have OBS open on the same display that is being captured by the program. Once you minimize OBS, this should stop.
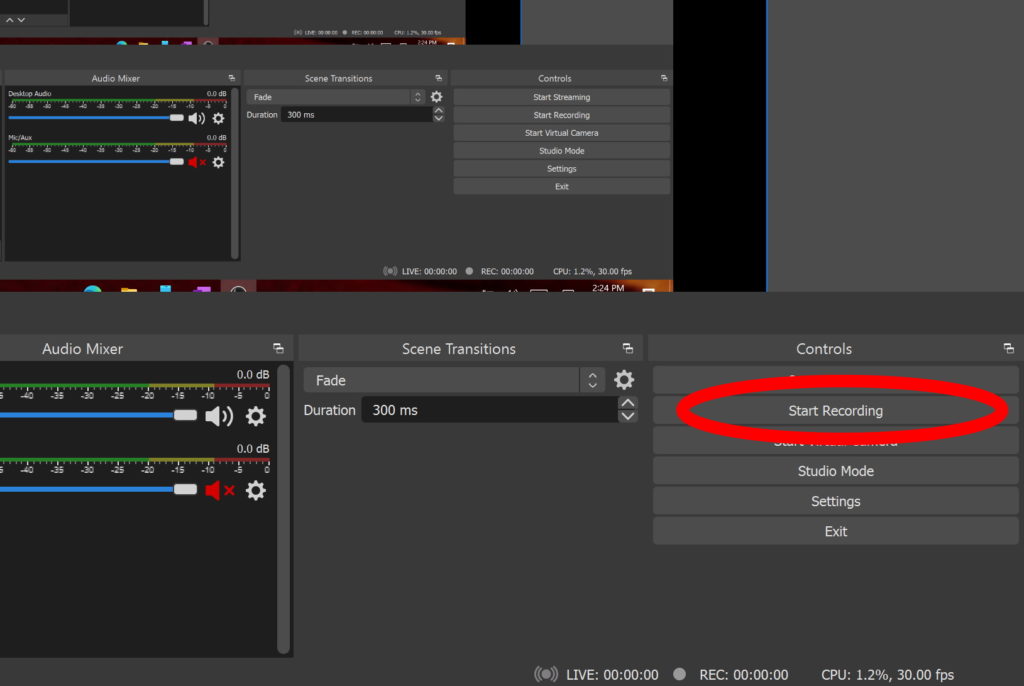
- Click Start Recording in the lower right to begin recording your screen.
It’s important to remember that you need to configure the save location and file format before you begin. We’ll talk more about this in the next section.
Applies to: Windows 10, MacOS, MacBook Pro, MacBook Air, Surface Pro, Surface Go, Surface Laptop, Surface Book
Getting Started With OBS
OBS can look a little tricky for a first-time user. I highly recommend taking a visit to OBS's wiki to get more help. Their Quickstart Guide is especially useful. But don't worry, I'll quickly run you through a few quick steps, so you understand the basics.
Firstly, you'll need to download and install OBS using the link above. Make sure to download the version that's meant for your operating system (Windows 10 or MacOS). Once OBS is installed, open it up.
On the bottom of the screen, you'll see five sections. For this guide, you'll only need to focus on the section labeled Sources, as well as the Controls on the far right.
Under Sources, you'll see a plus sign (+). This button allows you to add a new video source. In this case, we want to add your display as its own video source to start screen recording on your laptop, so once you click the plus sign, select Display Capture.
After you click OK, things might look a little funky. It might look something like this:
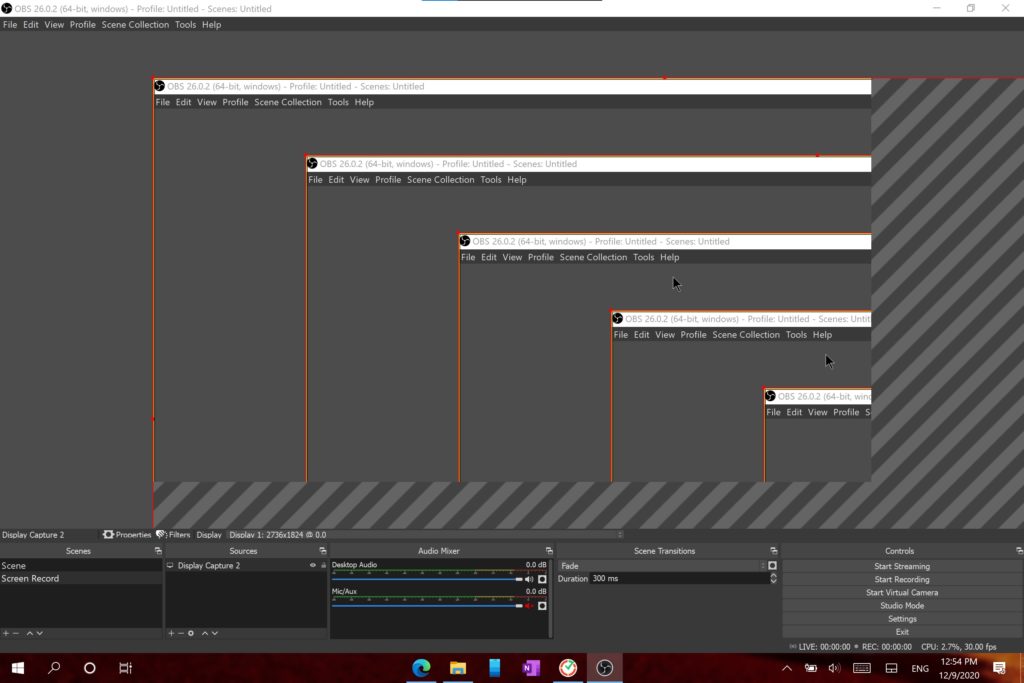
In the above image, you're seeing the infinite mirror effect. That's weird on its own, but it's normal. What isn't normal is that the windows we see in the preview are cut off. There are also a lot of striped areas in between the red borders of the preview canvas.
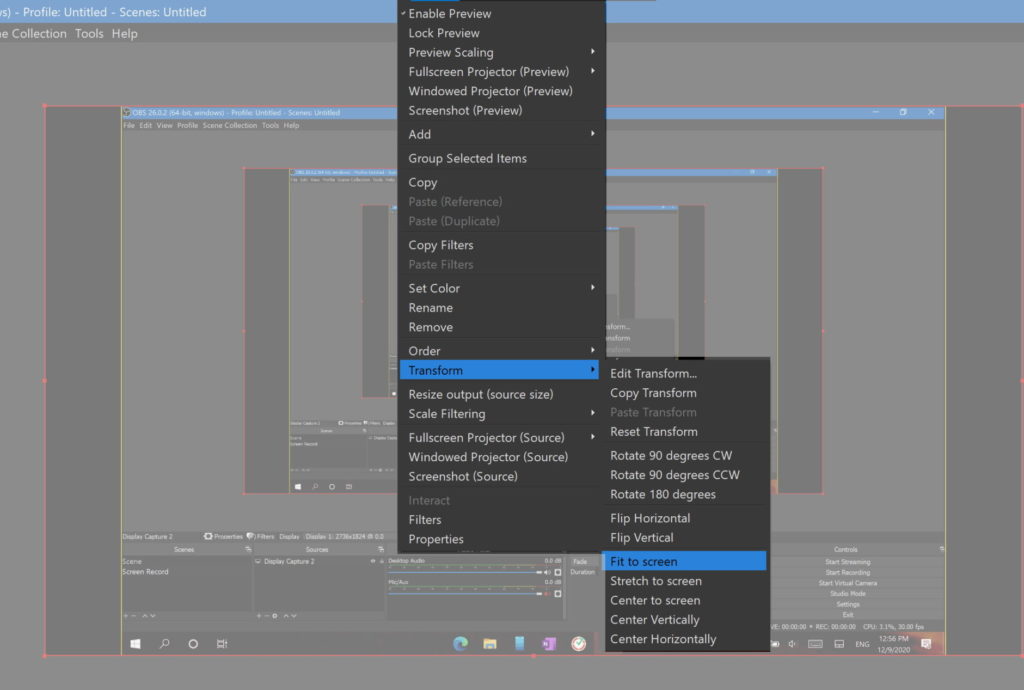
To resolve this, right click on the preview canvas. Click Transform -> Fit to screen. This should make it possible for you to record your entire display.
Congratulations! Now you're almost ready to start screen recording on your laptop!
Setting A Filetype, Resolution, And Save Location With OBS
Before you start screen recording, it's important to set a custom save location for your recordings, as well as their resolution and filetype.
Under the Controls category in the lower-right hand corner of the app, click Settings. Then, hit Output. Under the Recording section on this page, you should see Recording path. Click on Browse to choose the directory and folder in order to save your recording files.
From here, you can set the quality and format of the videos that you want to make. Keep in mind that the higher the quality, the larger the file size. Videos can take up a lot of space on your hard drive!
Consider getting an external hard drive to help you store lots of videos, if you plan on recording a lot. I personally recommend SanDisk's 1 TB Extreme Portable SSD from Amazon.
Recording
Now that all of that is out of the way, you're ready to start screen recording on your laptop with OBS! Just click on Start Recording to begin, and then click Stop Recording to stop.
You can also configure the hotkeys to control OBS through the menu, if you don't want to keep opening up OBS to start and stop the recordings. This is helpful to prevent the OBS infinite mirror effect from appearing in your videos. It can also save you time when editing the recordings later.
How To Screen Record On Windows 10 With PowerPoint
To screen record with PowerPoint, follow these steps:
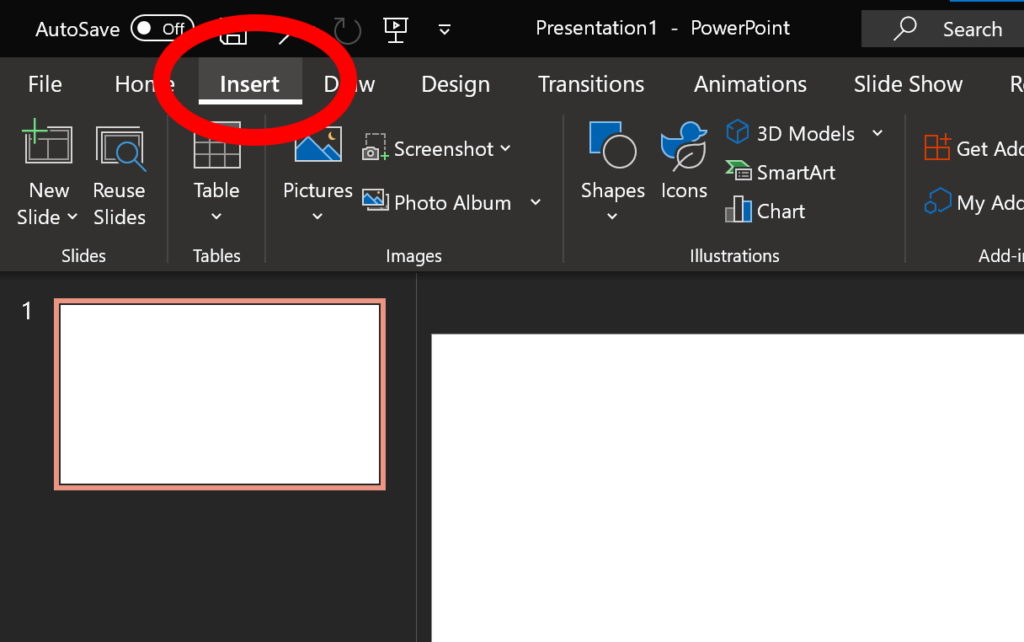
- Open PowerPoint.
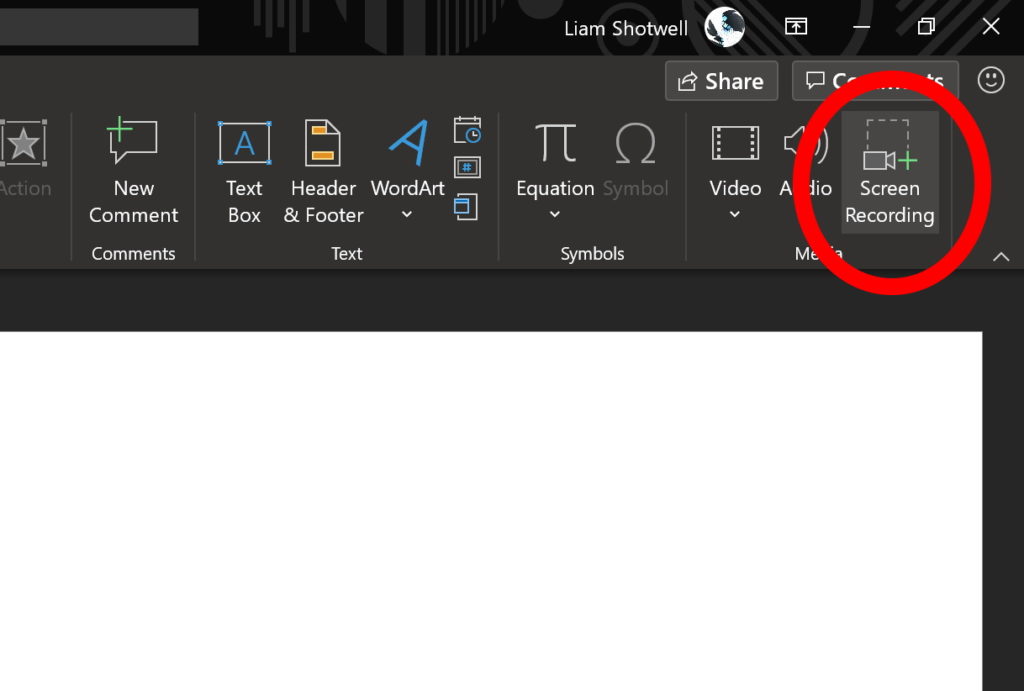
- On the top toolbar, select Insert -> Media -> Screen Recording.PowerPoint will minimize and a new toolbar will display on the top of the screen.
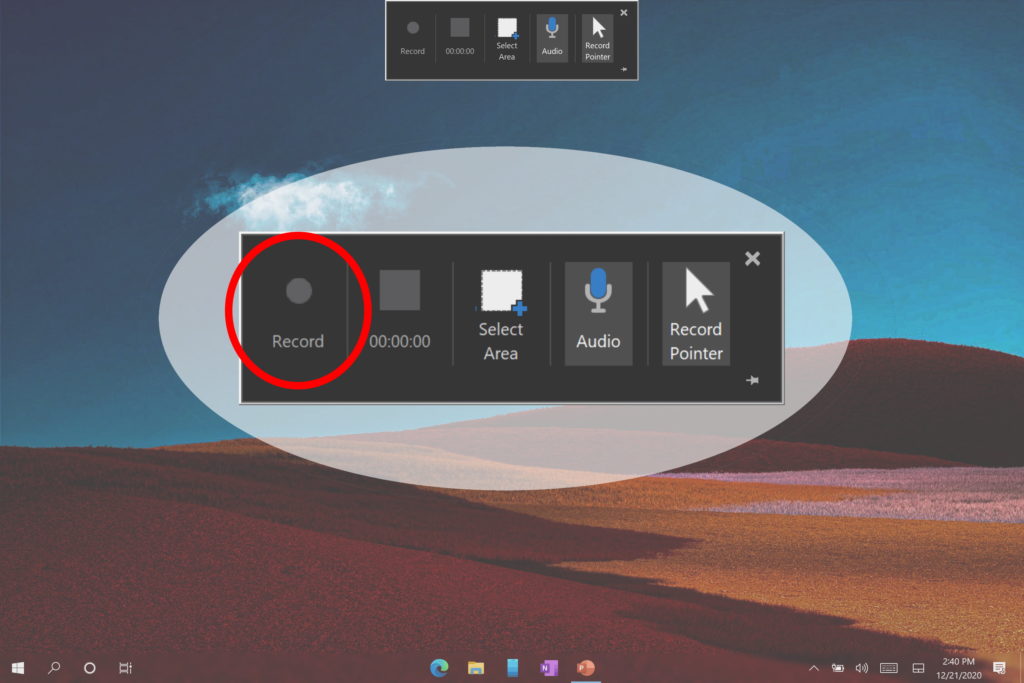
- Click and drag to set the area of the screen that you’d like to record. You can choose whether or not to record audio as well.
- Click Record to begin capturing your display.
Note that this is useful for simple tasks like recording on-screen problems or tutorials. However, the framerate won’t be high enough to record content like video games.
Applies to: Windows 10, Surface Pro, Surface Go, Surface Laptop, Surface Book
Screen Record On MacBook
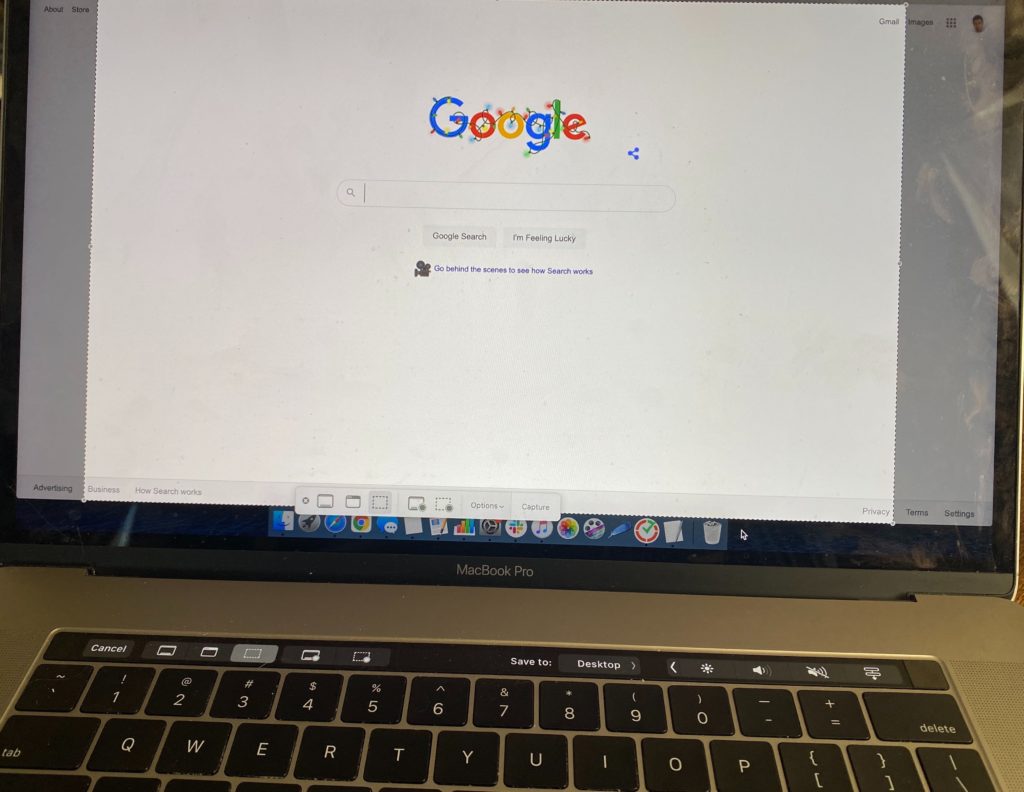
You can easily screen record on a MacOS computer by following these steps:
- Open the Screenshot toolbar by pressing the Shift + Command + 5 keys together.
- Click on the fourth icon from the left to record your entire screen. Use the icon to the right of that one to record a portion of your display.
- If you’re recording a portion of your display, click and drag to establish the area that will be recorded.
- Press the Command + Esc (Escape) keys to stop recording, or click the stop button in the menu bar.
- When you’re done recording, a thumbnail will appear in the lower right-hand corner of your screen. Click on it to save, trim, or share it.
Applies to: MacBook Air, MacBook Pro, MacOS
One of the cool things about this method of recording your screen is that it's built into MacOS itself. There's no need to download additional software or go through a ton of different menus.
On Windows 10, there's a built-in screen recording feature through the Xbox Game Bar, but only for one app at a time.
In the Screenshot toolbar, you can adjust the settings to change where your screenshots and screen recordings are saved by default. You can also set a timer to start recording after five or ten seconds after you click record. From here, you can also configure microphone settings, if you want a voiceover to go along with your recording.
Start Recording Your Laptop's Screen!
Now that you know how to screen record on your laptop, you're ready to start making videos. These methods can help you make cool tutorials, show off your skills in your favorite video games, and capture elusive software bugs on tape.
Whether you're on a Windows 10 or MacOS device, screen recording should be no problem for you. However, things don't always go as expected! Let us know in the comments if you have any questions or issues! Thanks for reading.