iPhone X Camera Not Working? Here's Why & The Fix.
Your iPhone X camera won't work and you don't know why. Whether the screen is black or blurry, the camera may not be working due to a software or hardware issue. In this article, I'll explain why your iPhone X camera is not working and show you how to fix the problem for good!
Is My iPhone X Camera Broken?
At this point, we can't be sure whether your iPhone X camera is not working because of a software or hardware issue. Just like any other built-in iOS app, the Camera app is prone to crashes from time to time.
There's a chance the camera on your iPhone X isn't working because of a software crash, and we'll show you how to fix that problem below.
Be Wary Of Third-Party Camera Apps
One of the most common reasons why an iPhone X camera is not working is because you were using a third-party camera app, not the built-in Camera app on your iPhone. Third-party camera apps are prone to crashes, and we've had first-hand experience this in the early days of our YouTube channel.
David and I tried using a third-party camera app for the overhead shot in our videos. However, after having to do many frustrating reshoots because our app had crashed, we finally decided we were better off using the built-in Camera app. Since then, we've experienced zero software crashes while recording our videos.
Here's the moral of the story: if you're using a third-party camera app that crashes a lot, it's probably the reason why your iPhone X camera is not working.
If you're not using a third-party camera app, follow the steps below to diagnose and fix the real reason why your iPhone X camera won't work.
How To Fix An iPhone X Camera That's Not Working
8 Steps TotalRestart Your iPhone
Restarting your iPhone can sometimes fix minor software glitches and errors.
How Do I Restart My iPhone?
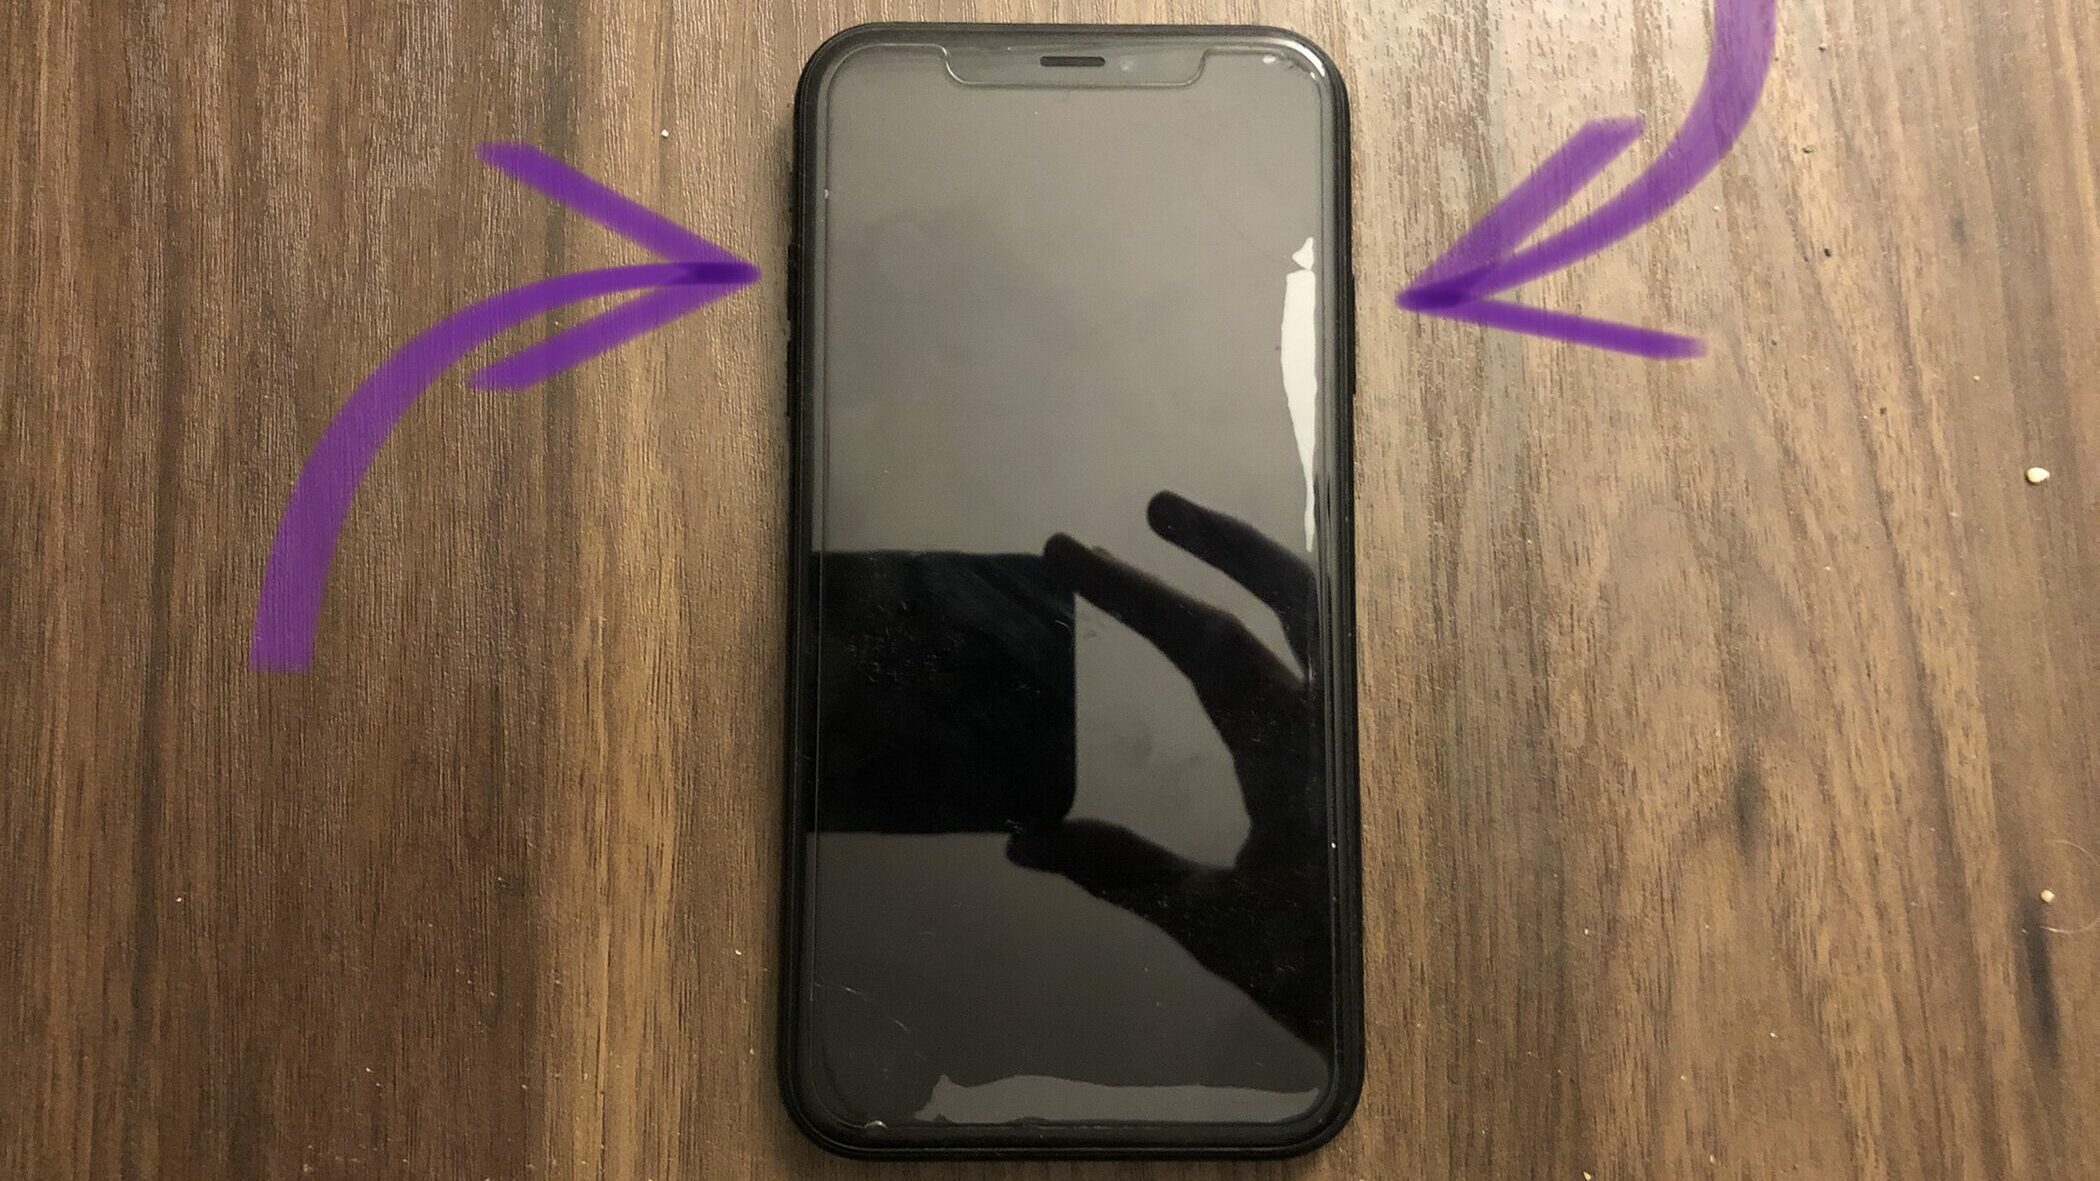
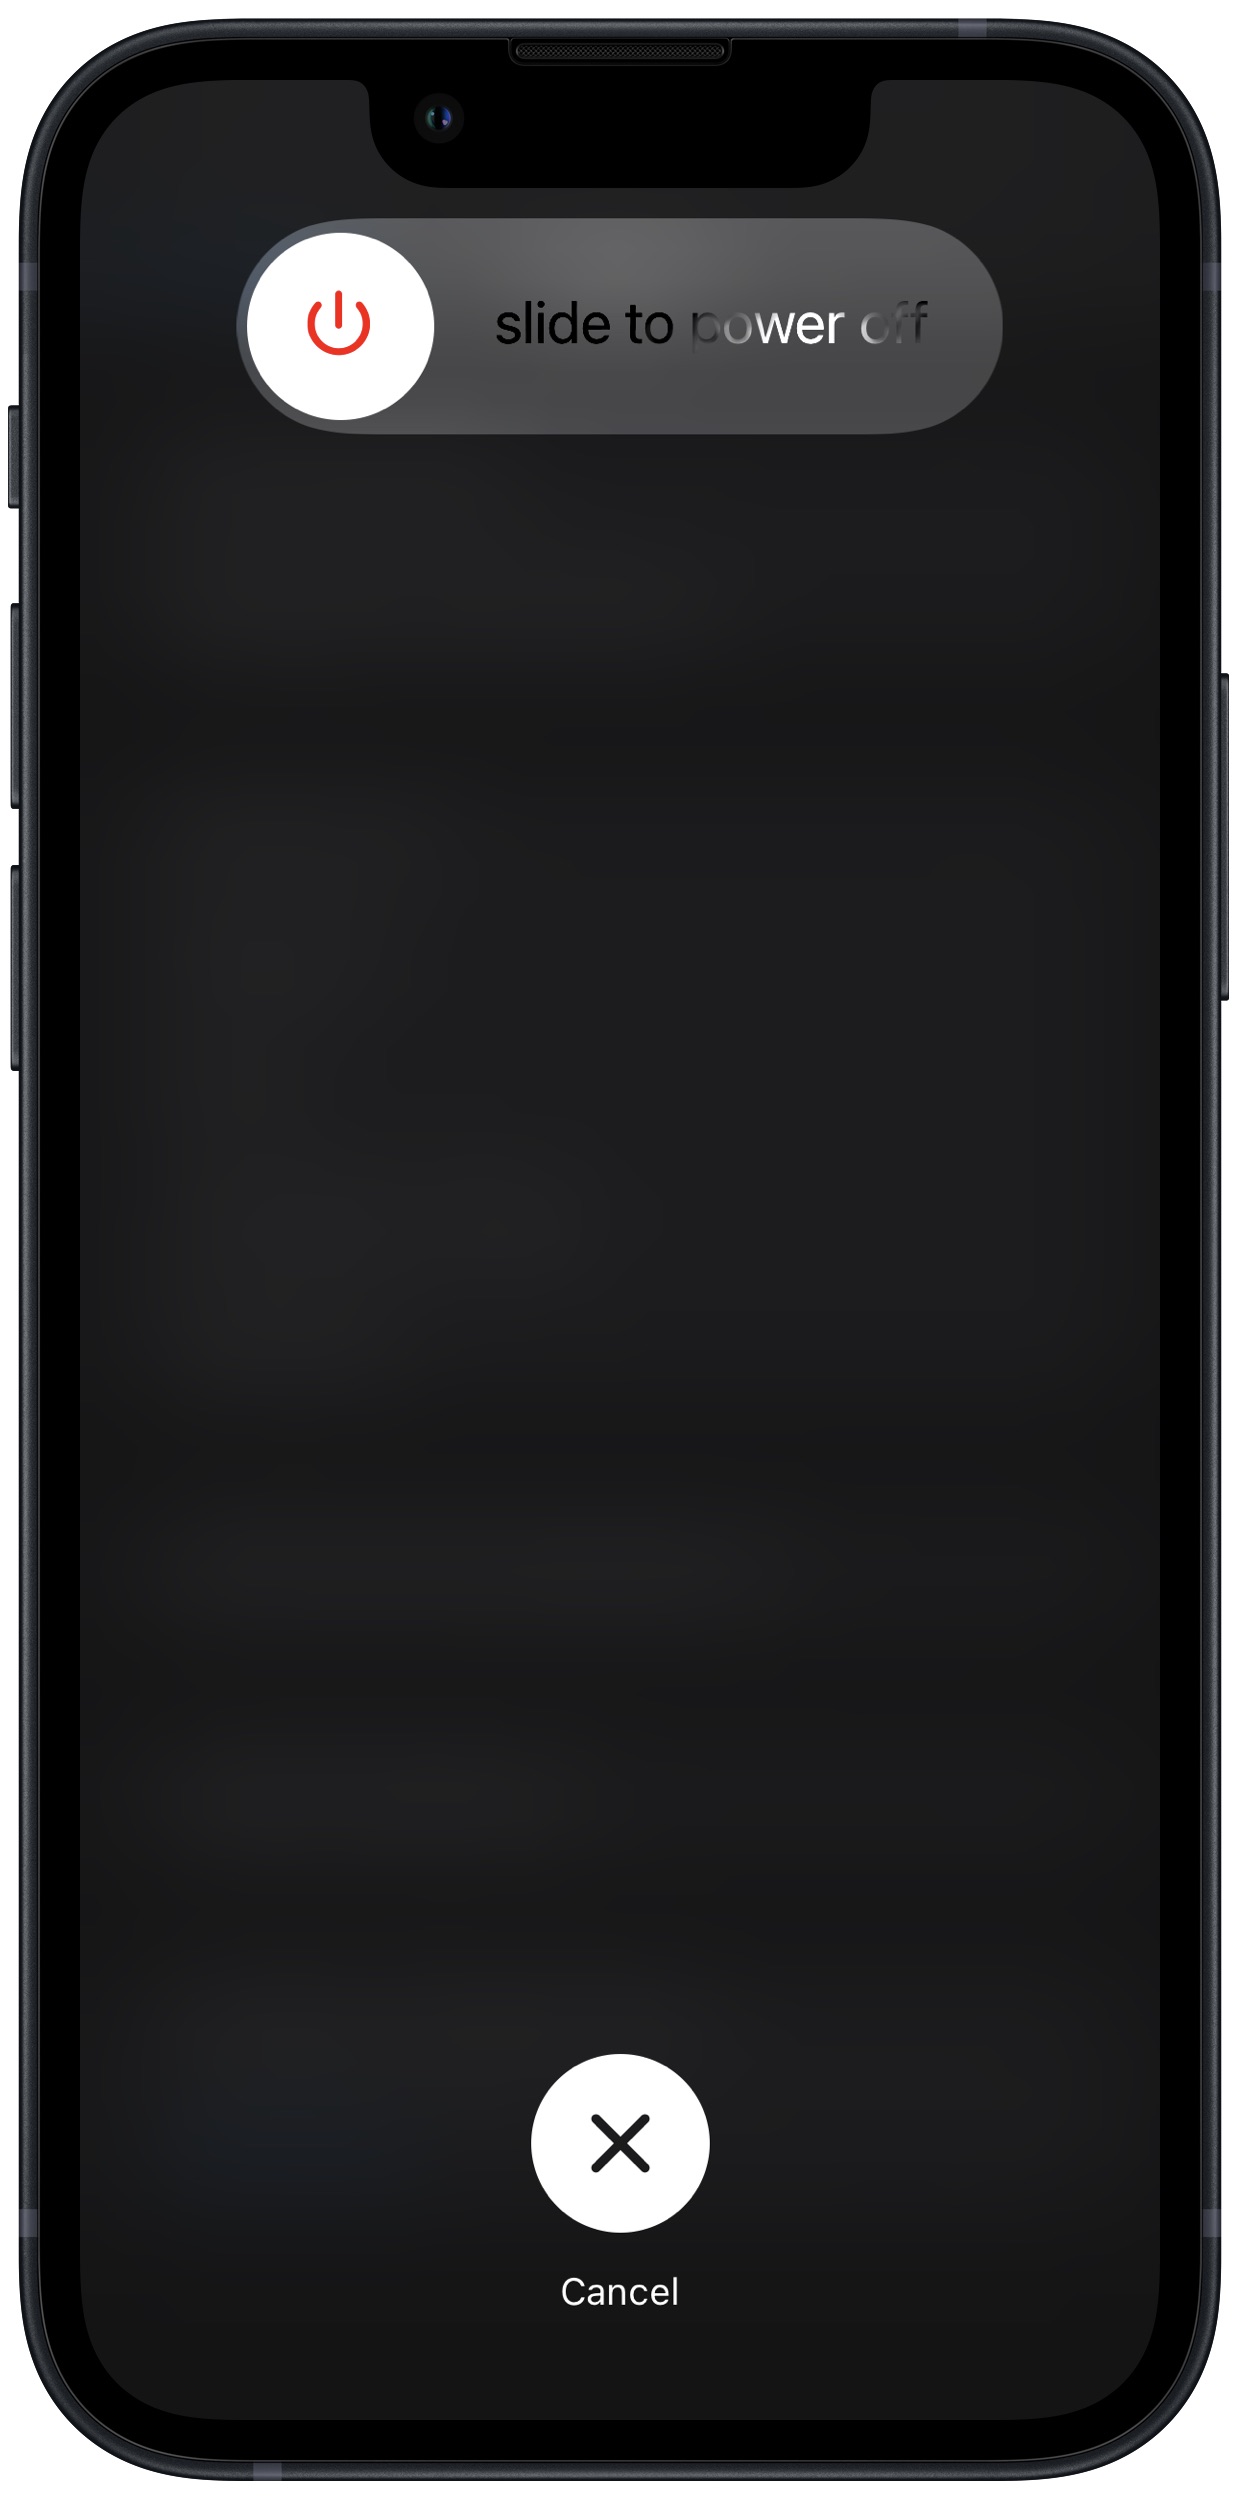
- Press and hold the power button (iPhones without Face ID) or the side button and either volume button (iPhones with Face ID) on your iPhone until the slide to power off slider appears on the display.
- Swipe the red power icon from left to right to turn off your iPhone.
- Wait about 30 seconds, then press and hold the power button (iPhones without Face ID) or the side button (iPhones with Face ID) again until the Apple logo appears in the center of the display.
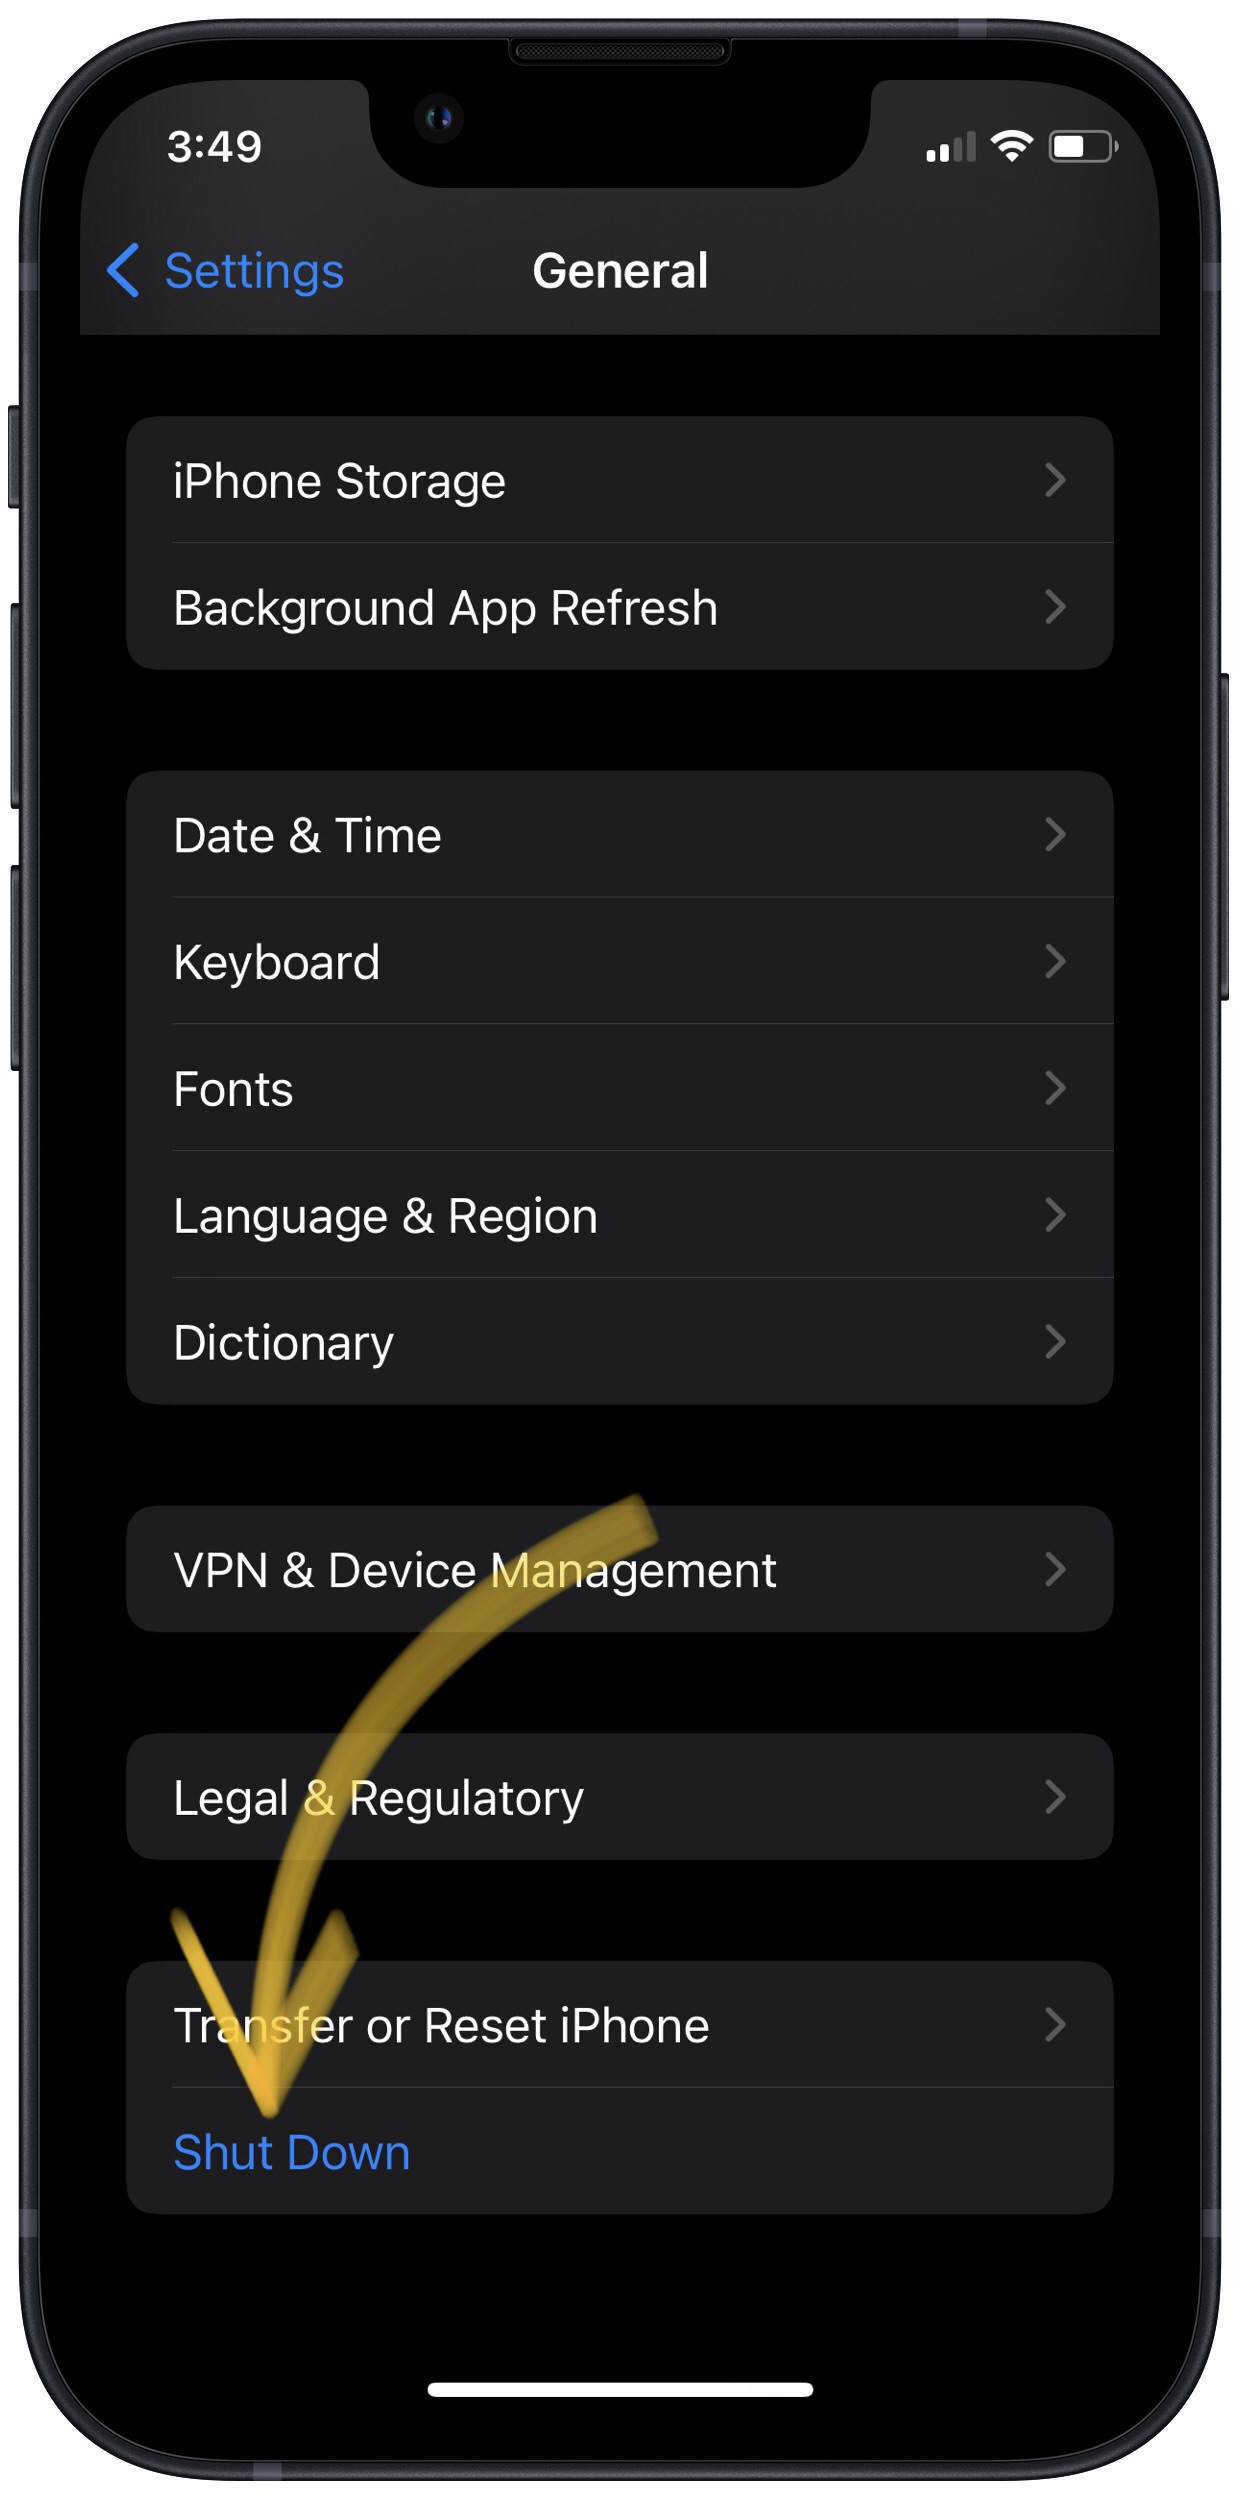
Turn Off Your iPhone In The Settings App (Option 1)
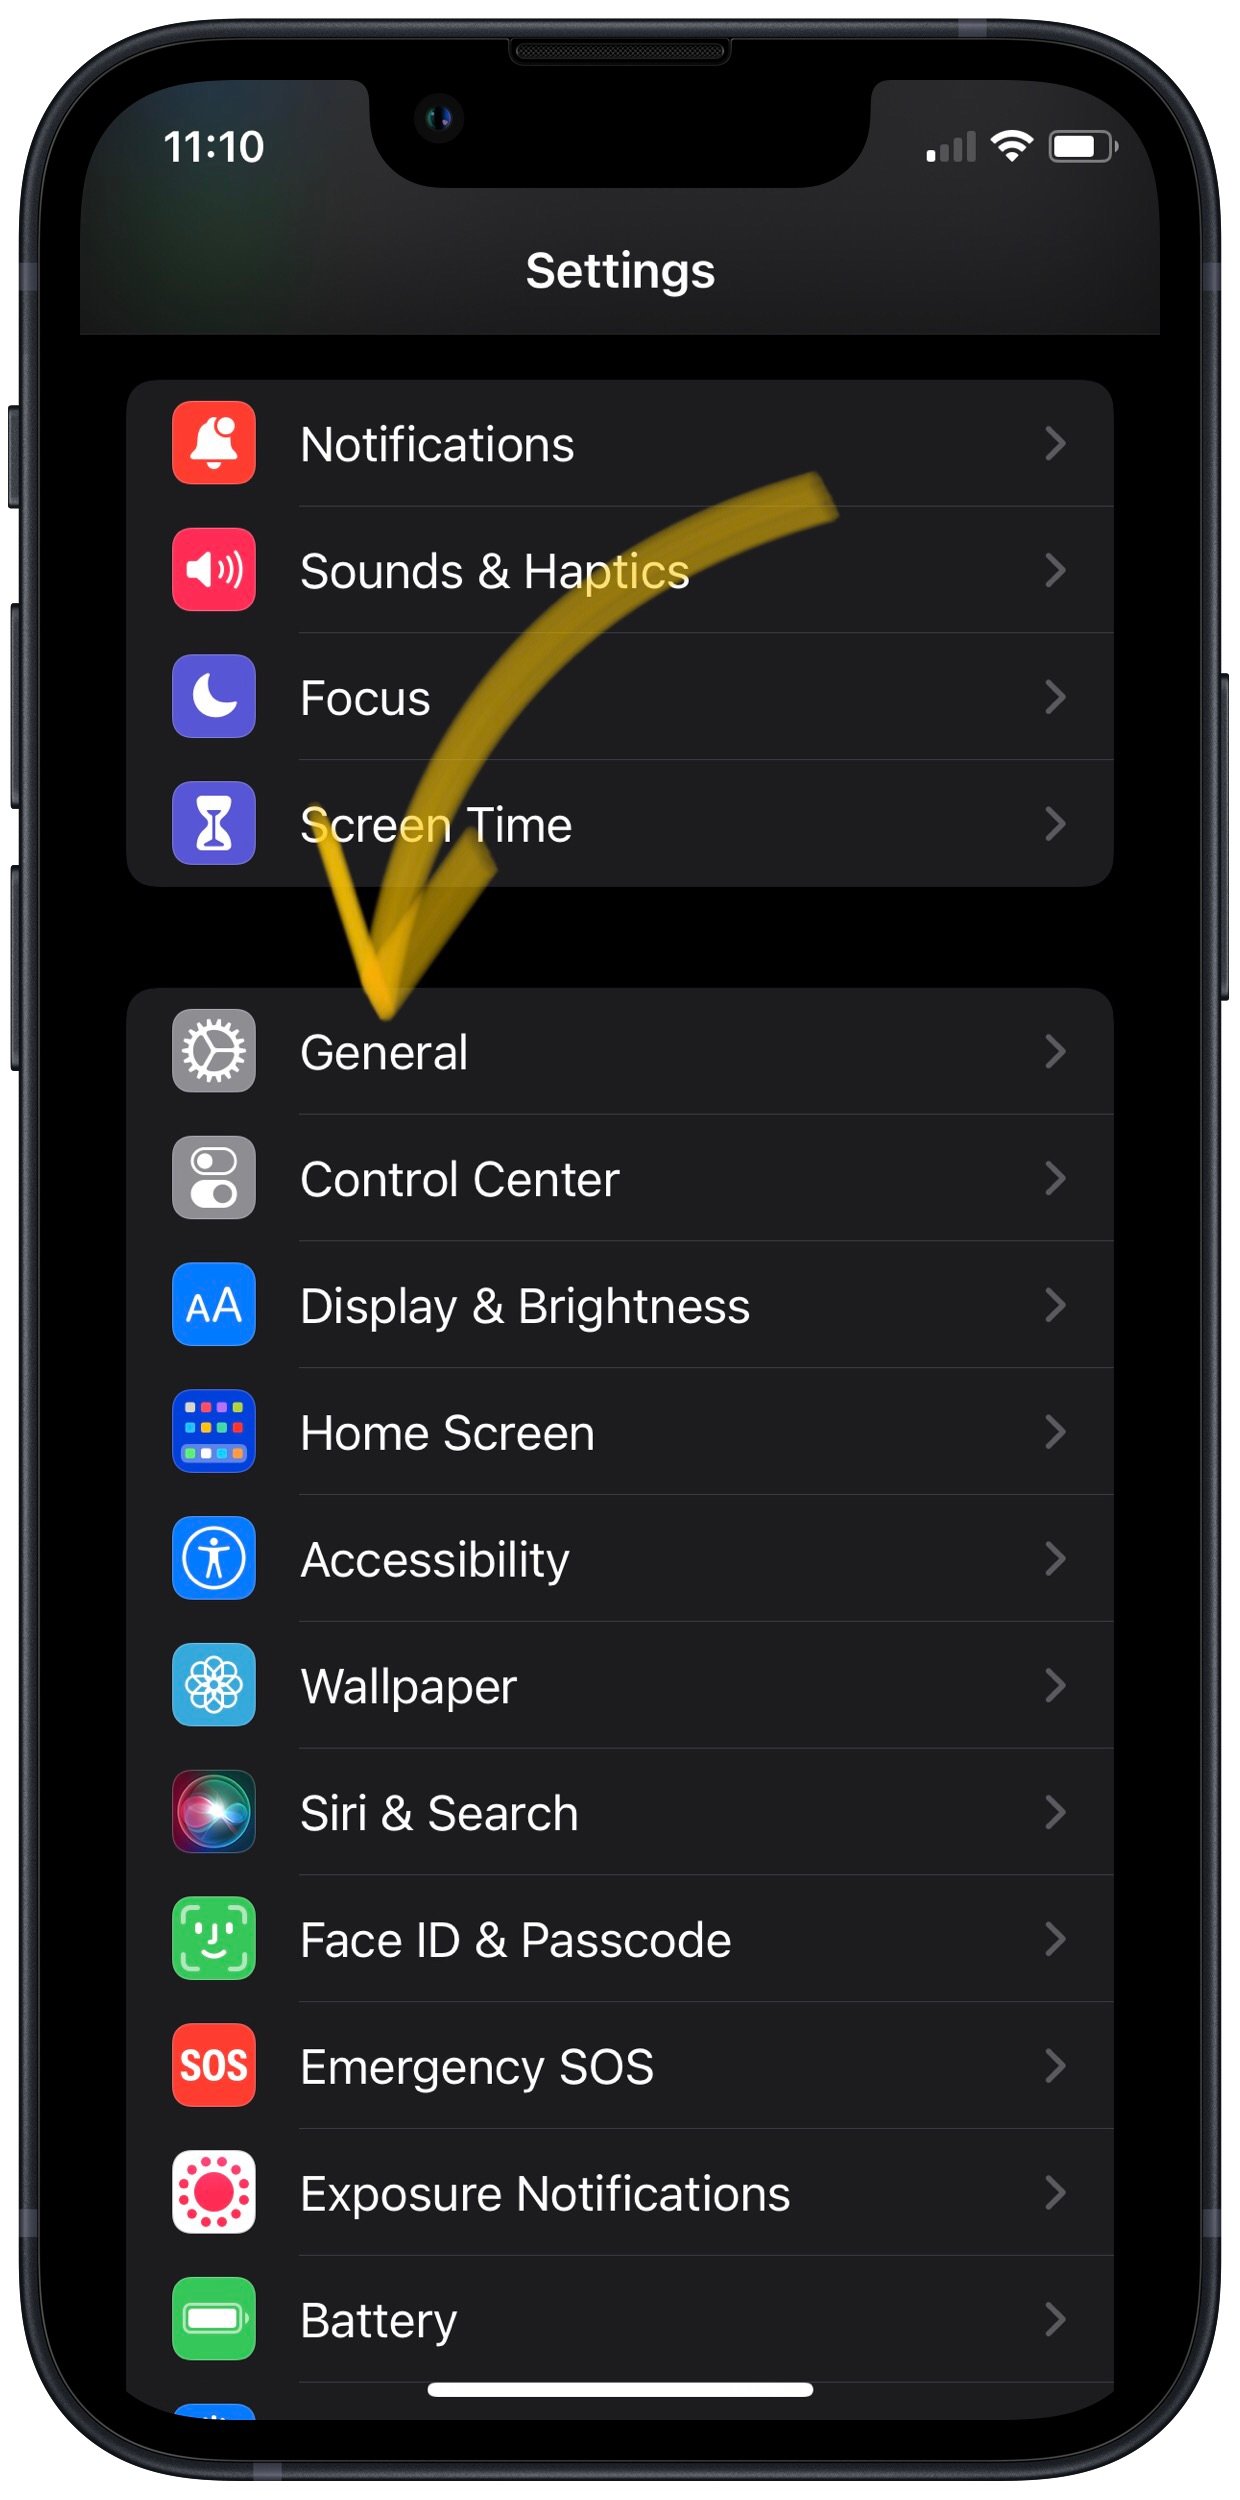
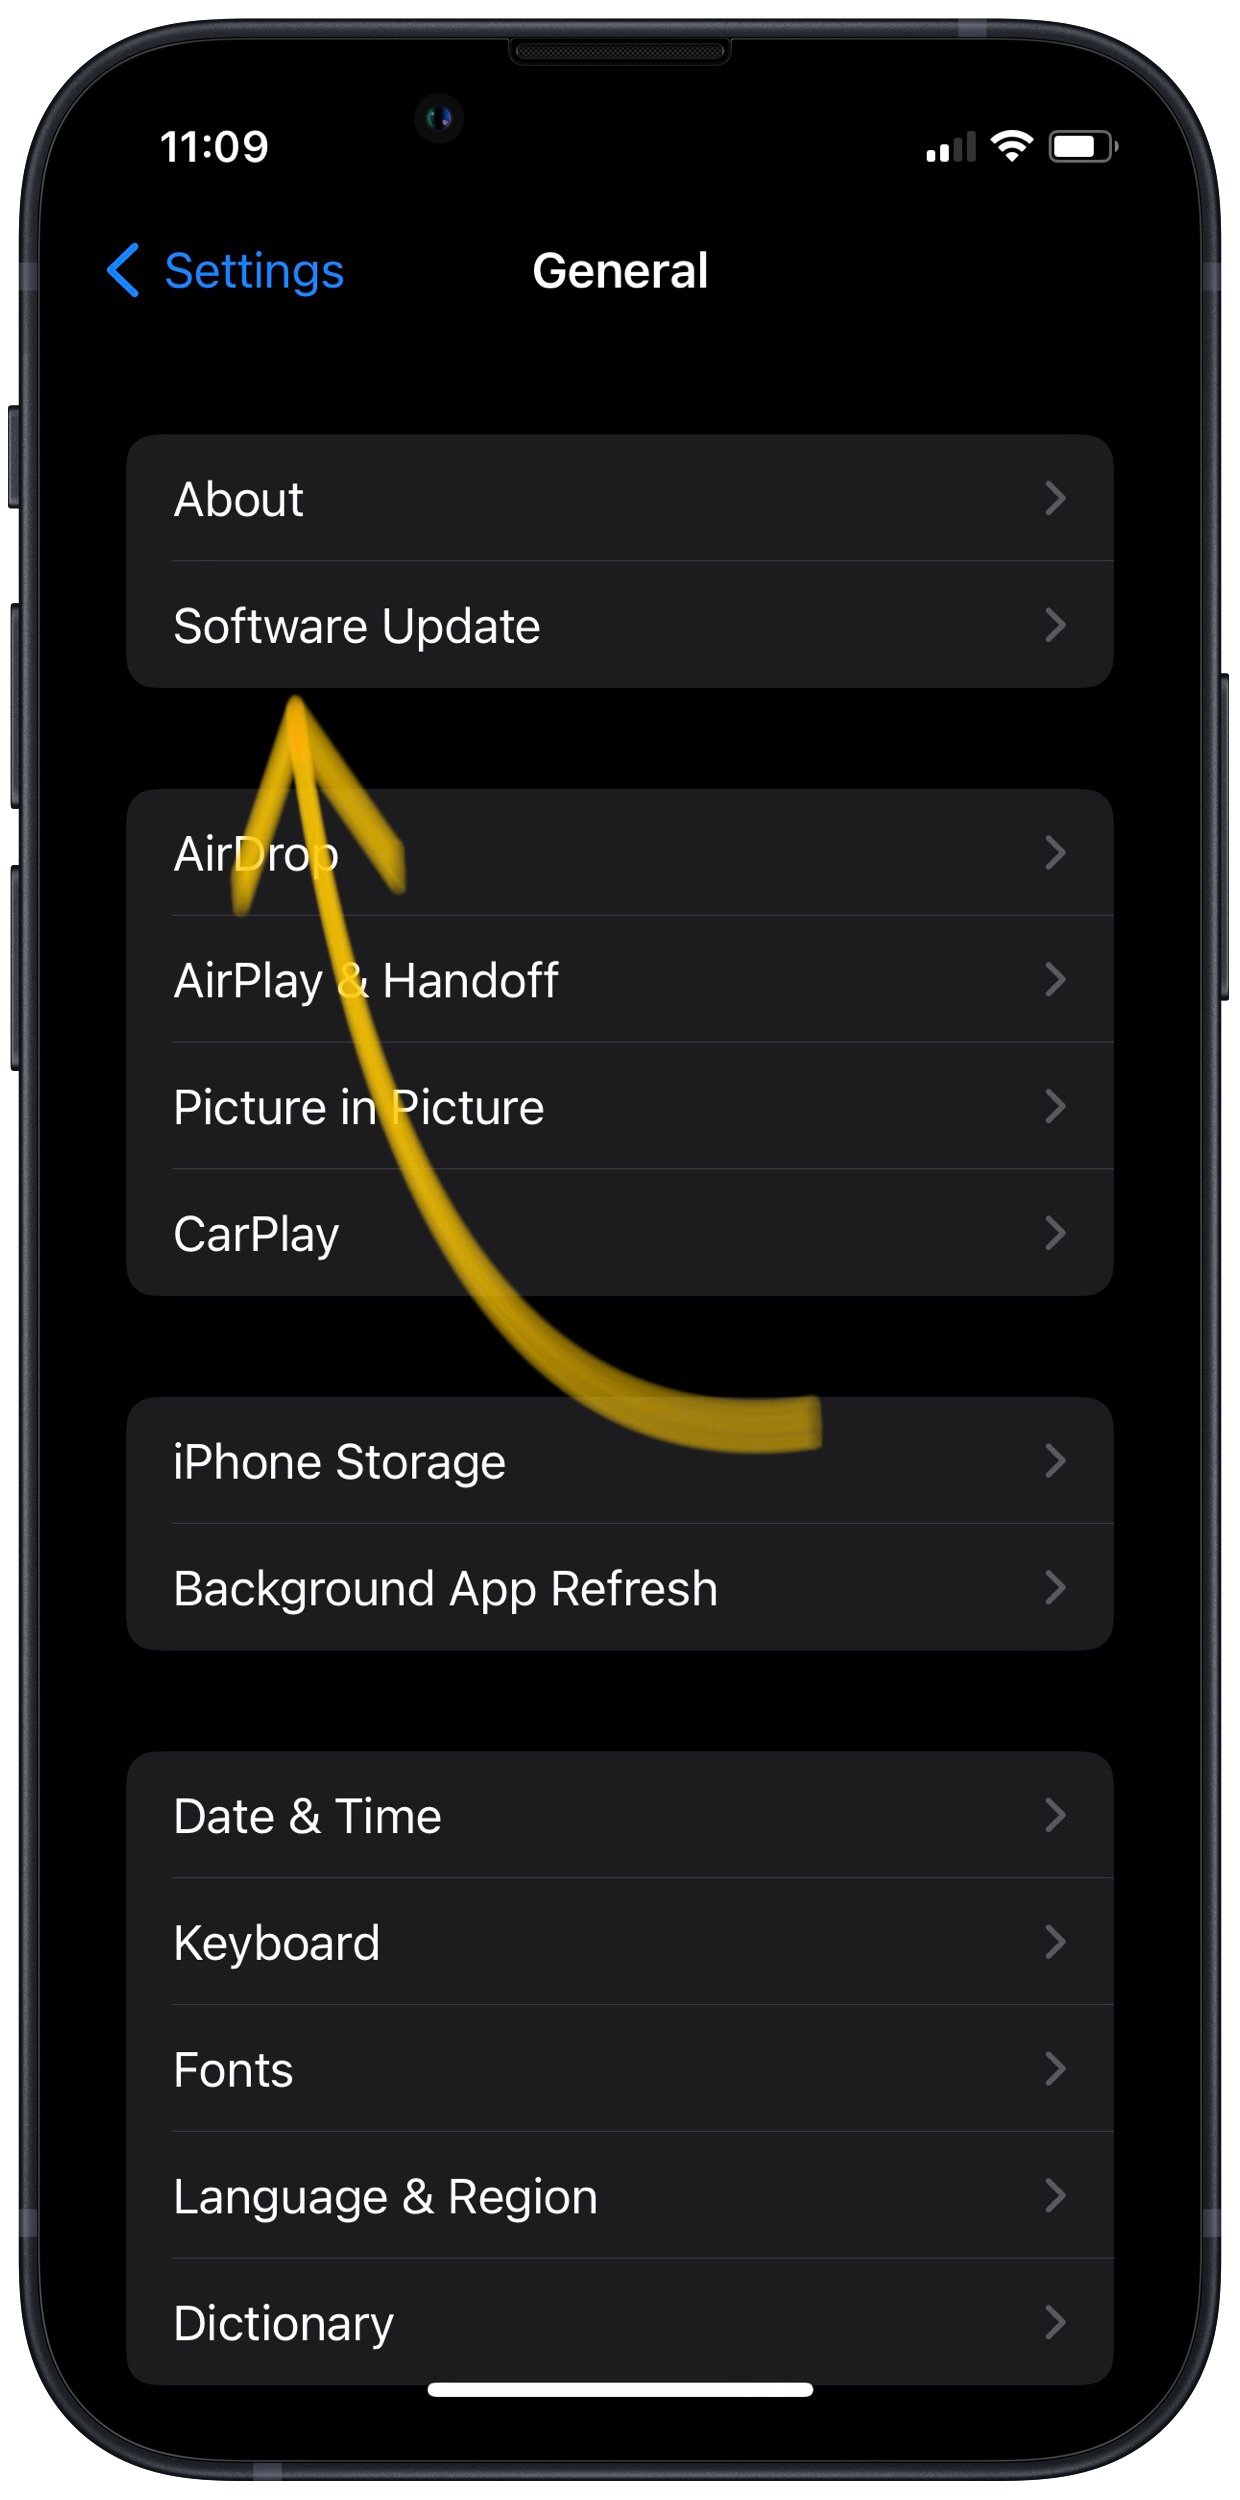
- Open the Settings app on your iPhone.
- Tap General.
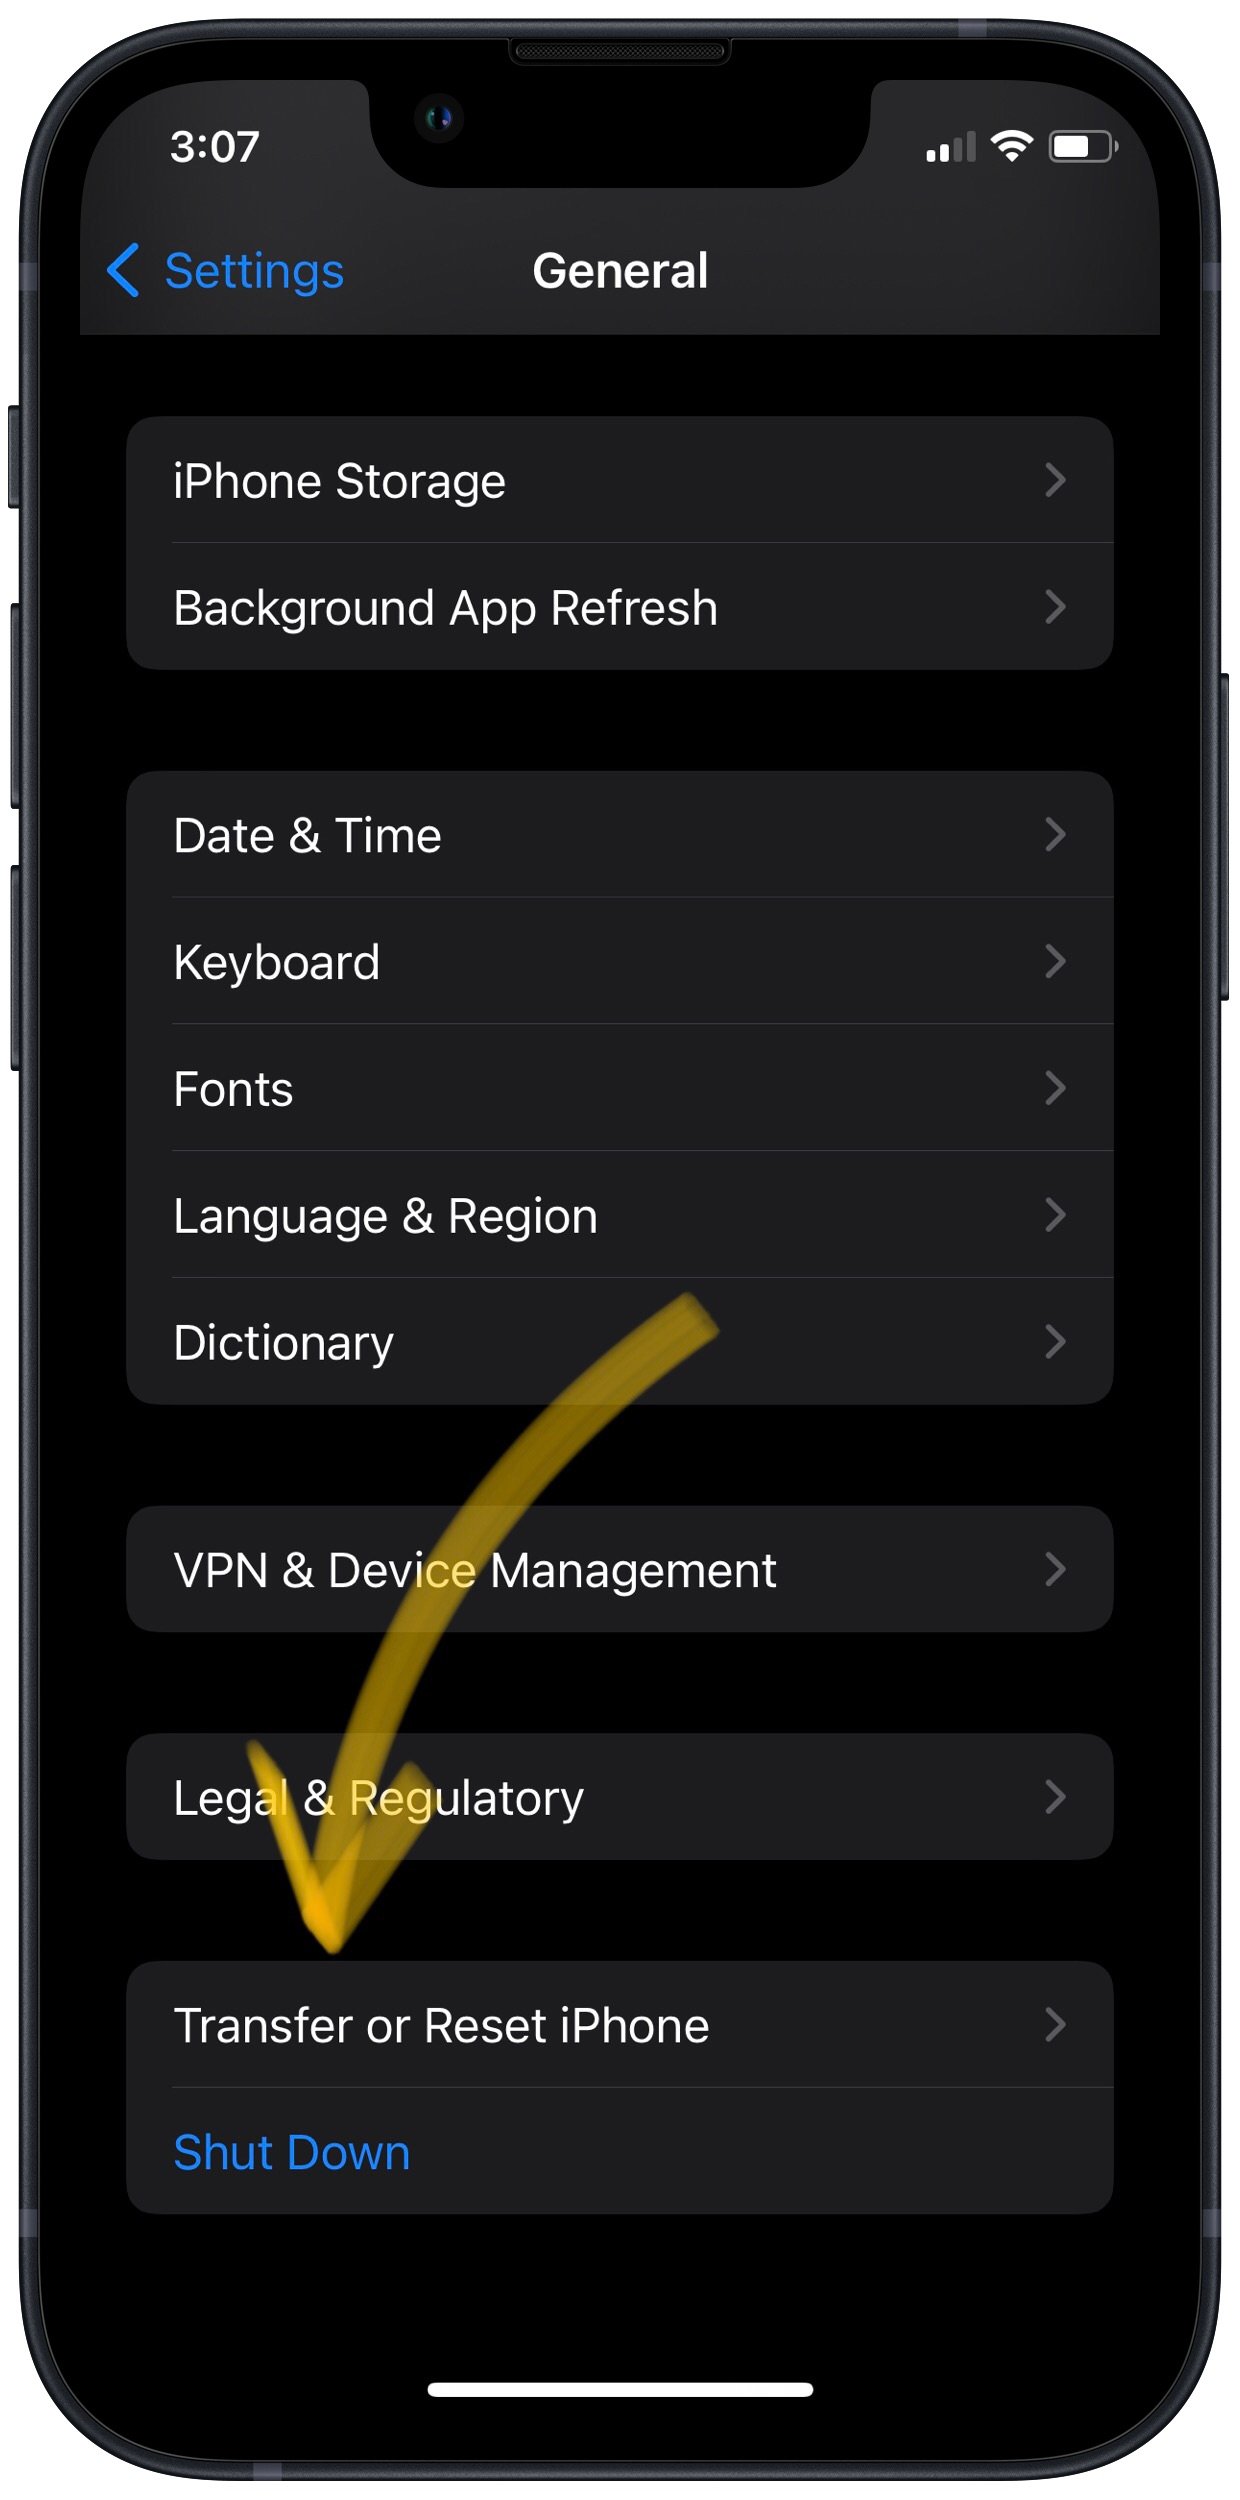
- Scroll to the bottom and tap Shut Down.
- Swipe the red power icon from left to right.
- Plug your iPhone into a power source using a Lightning cable to turn it on again.
Turn Off Your iPhone Using AssistiveTouch
- Watch our YouTube video or follow the steps below!
- Open the Settings app.
- Tap General.
- Tap Accessibility.
- Tap AssistiveTouch.
- Turn on the switch next to AssistiveTouch.
- Tap the AssistiveTouch button when it appears on the display.
- Tap Device.
- Tap More.
- Tap Restart.
- Tap Restart again when the confirmation alert appears.
Applies To: iPhone 5,iPhone 5S,iPhone 5C,iPhone 6,iPhone 6 Plus,iPhone 6S,iPhone 6S Plus,iPhone SE,iPhone 7,iPhone 7 Plus,iPhone 8,iPhone 8 Plus,iPhone X,iPhone XS,iPhone XS Max,iPhone XR,iPhone 11,iPhone 11 Pro,iPhone 11 Pro Max,iPhone SE 2
View MoreClose Out Of The iPhone X Apps You Aren't Using
Apps remain loaded in the background of your iPhone X when you leave them open. This way, they'll be ready right away if you want to use them again.
However, when apps are left open in the background of your iPhone, they still have the ability to send and receive data, which can start to cause iPhone X battery drain. There's also a chance that they'll crash, which would make your iPhone X battery die quickly.
How Do I Close Out Of The iPhone X Apps You Aren't Using?
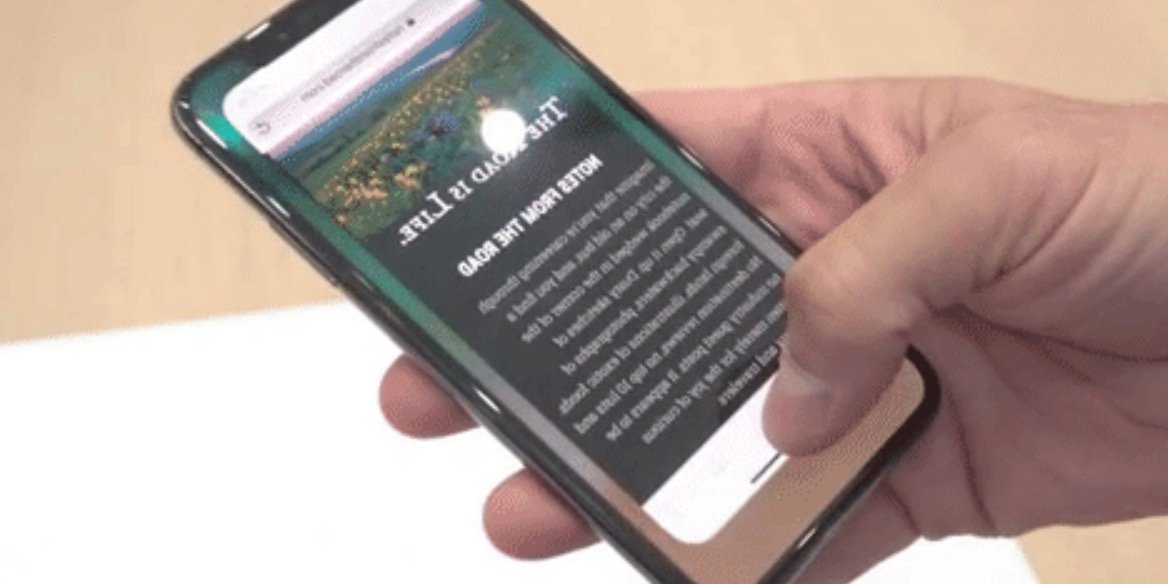
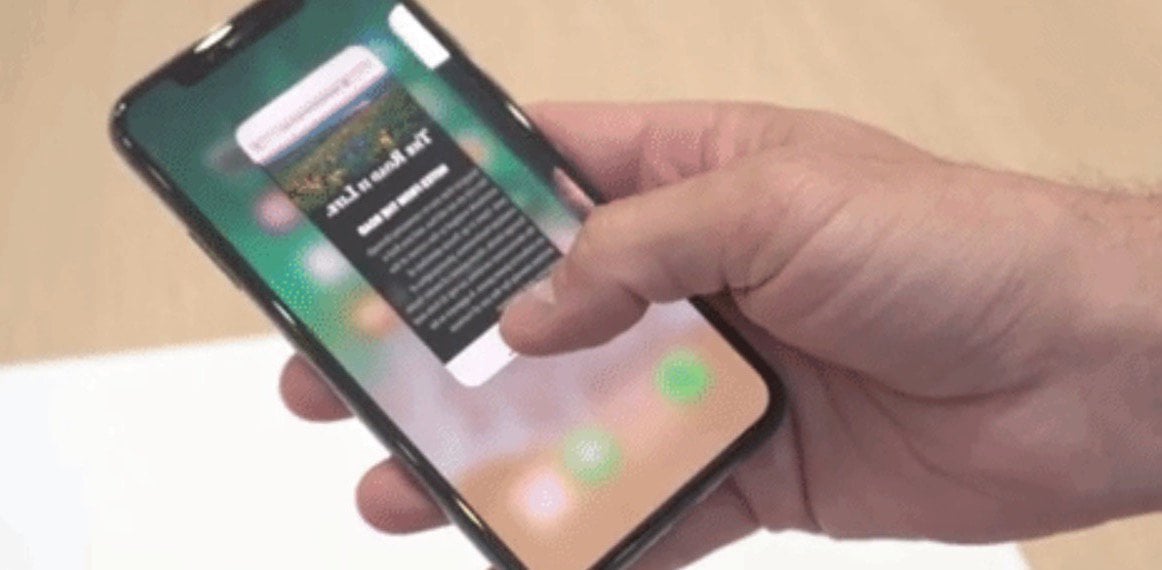
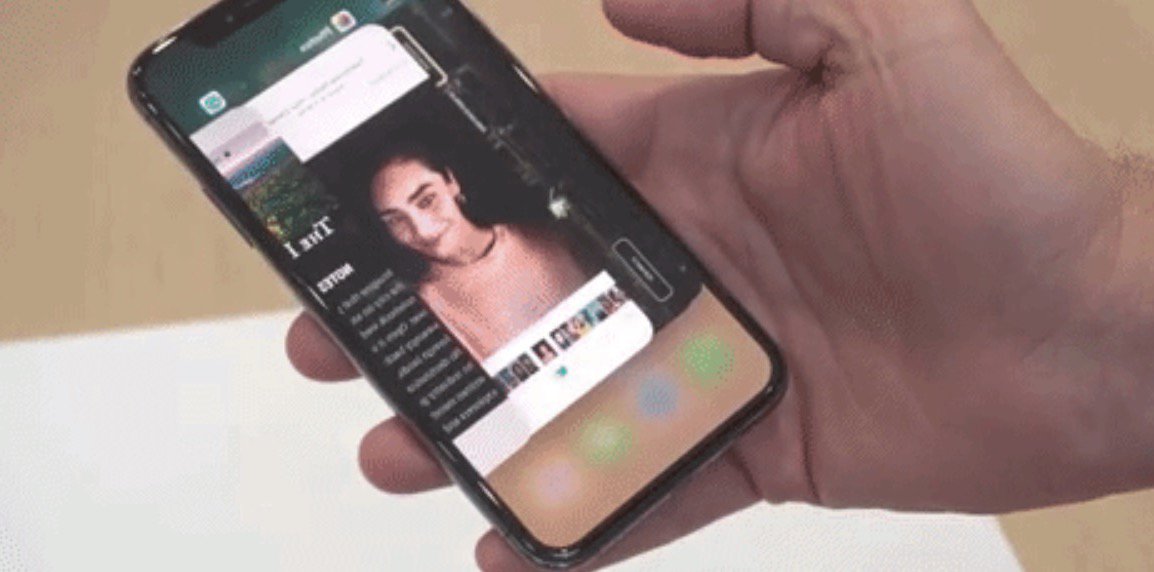
- Open the app switcher by slowly dragging your thumb from the bottom of the display to the center.
- Pause in the middle of the display until the app switcher opens — you'll know it's open when you see all of your open apps lined up horizontally.
- To close an app, swipe it up and off of the screen!
Applies To: iPhone X
View MoreUpdate Your iPhone Software In Settings
Apple puts out new software updates to improve efficiency, fix bugs, and introduce new features. Updating iOS can fix problems with your iPhone's software.
How Do I Update My iPhone Software In Settings?
- Open the Settings app.
- Tap General.
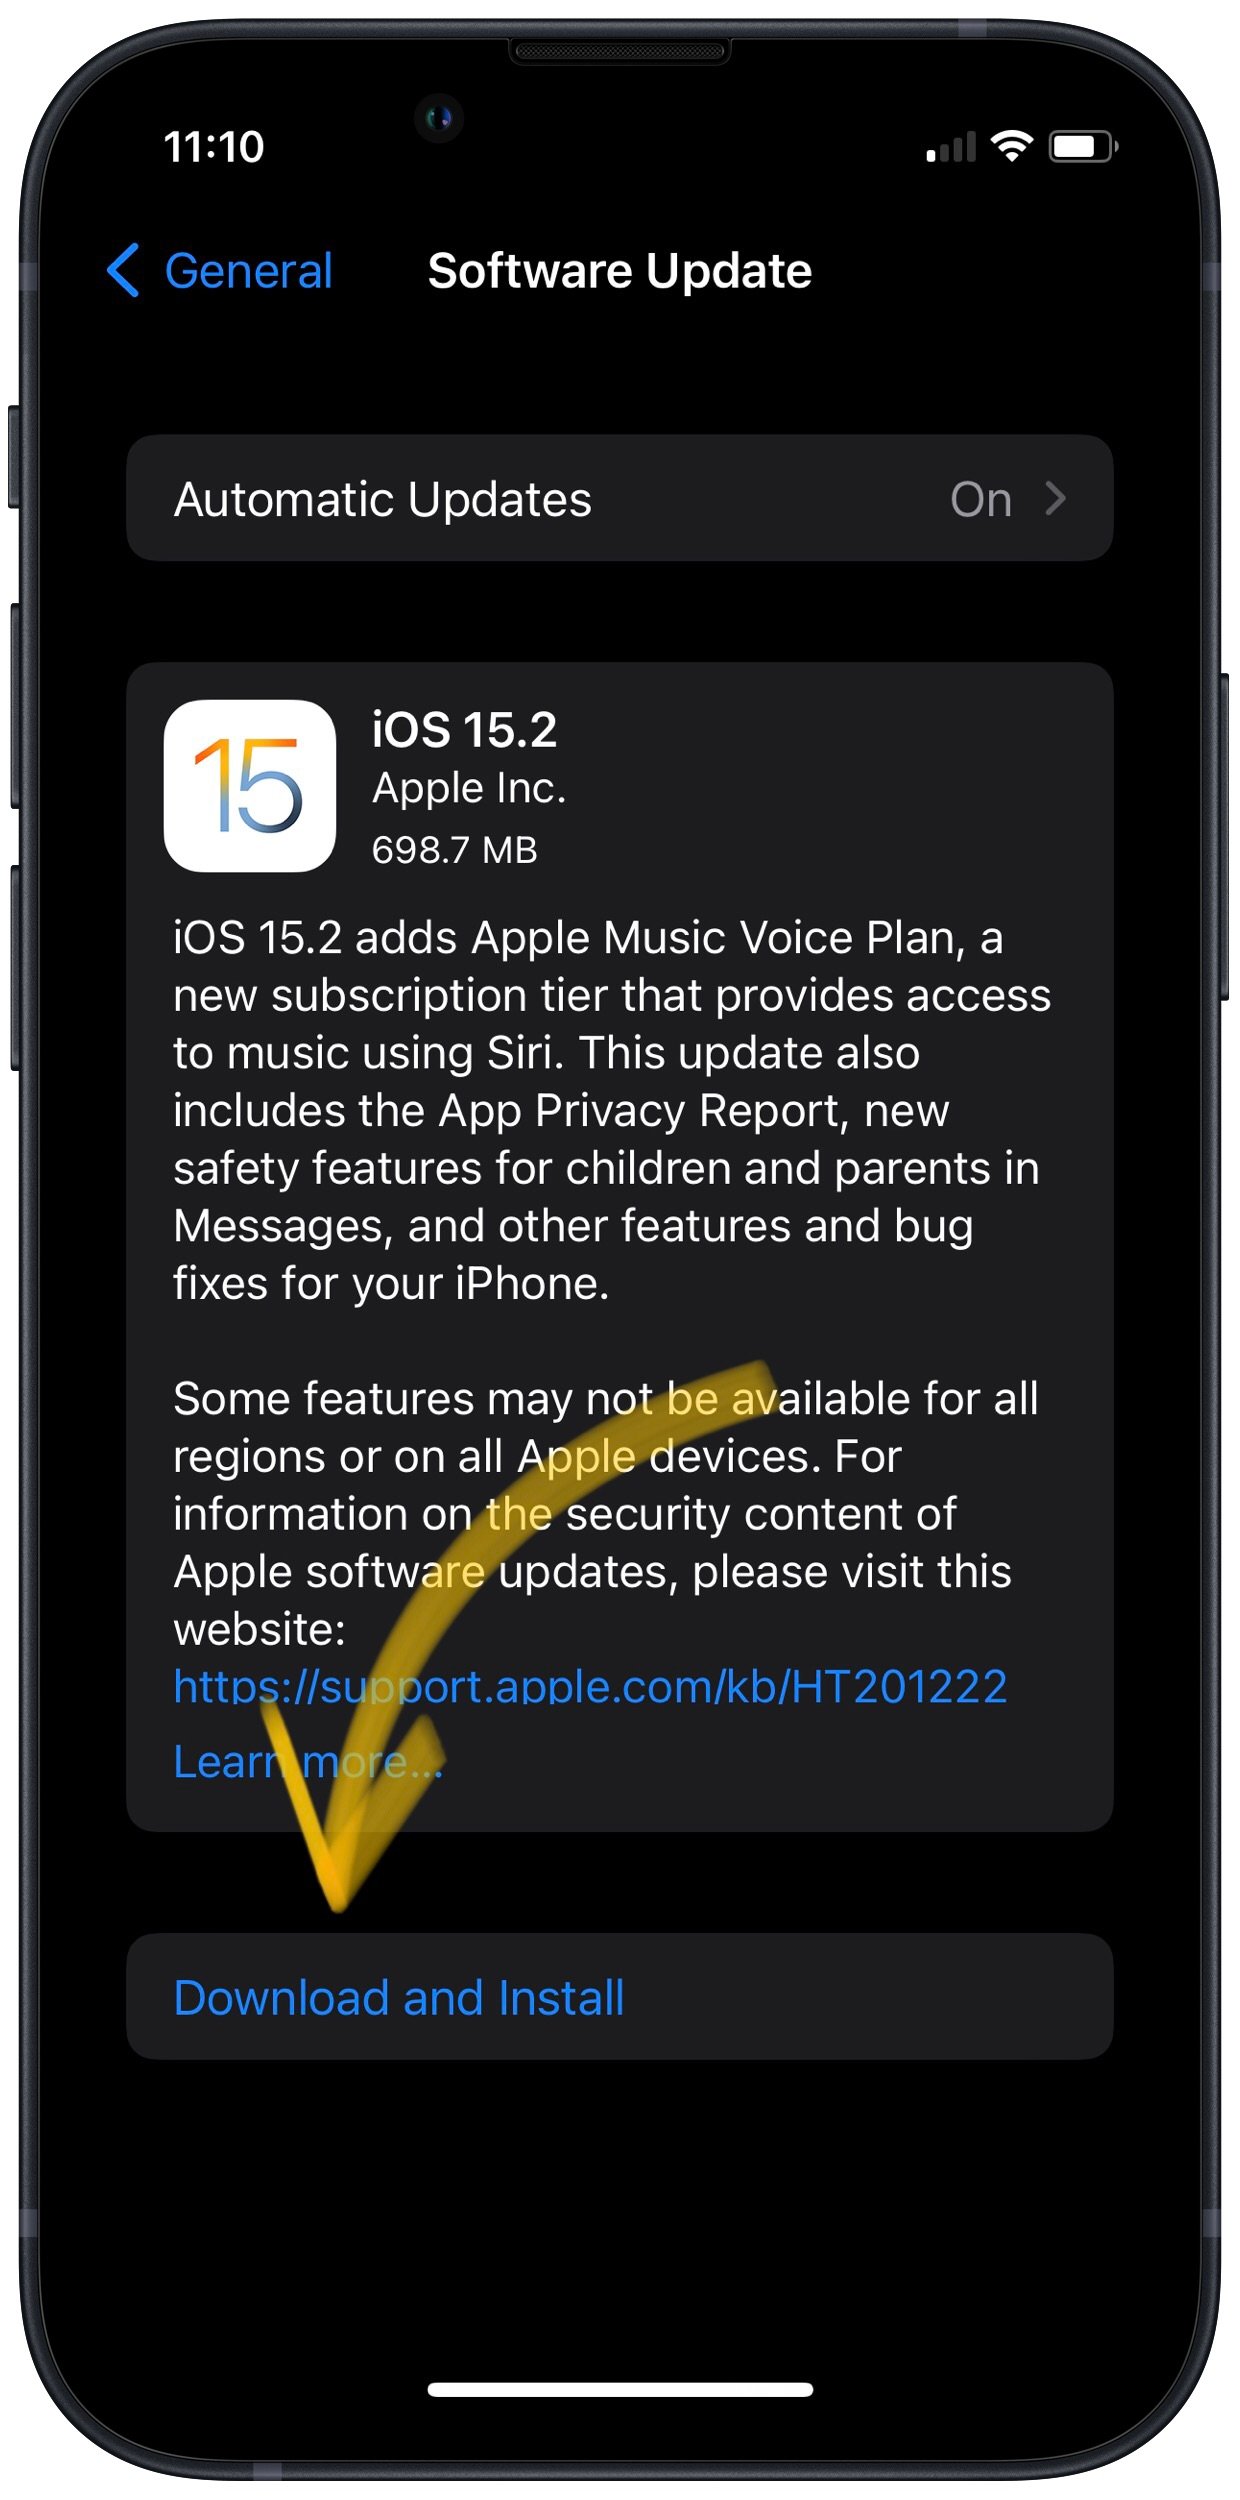
- Tap Software Update.
- Tap Download and Install or Install Now.
- Enter your passcode if prompted.
- The update will begin once it has been verified.
- The update is complete after your iPhone restarts.
Applies To: iPhone 5,iPhone 5S,iPhone 5C,iPhone 6,iPhone 6 Plus,iPhone 6S,iPhone 6S Plus,iPhone SE,iPhone 7,iPhone 7 Plus,iPhone 8,iPhone 8 Plus,iPhone X,iPhone XS,iPhone XS Max,iPhone XR,iPhone 11,iPhone 11 Pro,iPhone 11 Pro Max,iPhone SE 2
View MoreReset All Settings
Many iPhone problems are caused when Settings isn't set up correctly or by corruption within individual Settings app files. Restoring the Settings app back to factory defaults doesn't fix every iPhone software problem, but it is a go-to fix for Apple technicians because it does solve a lot of problems that would be very difficult to to track down by hand.
How Do I Reset All Settings?
- Open the Settings app.
- Tap General.
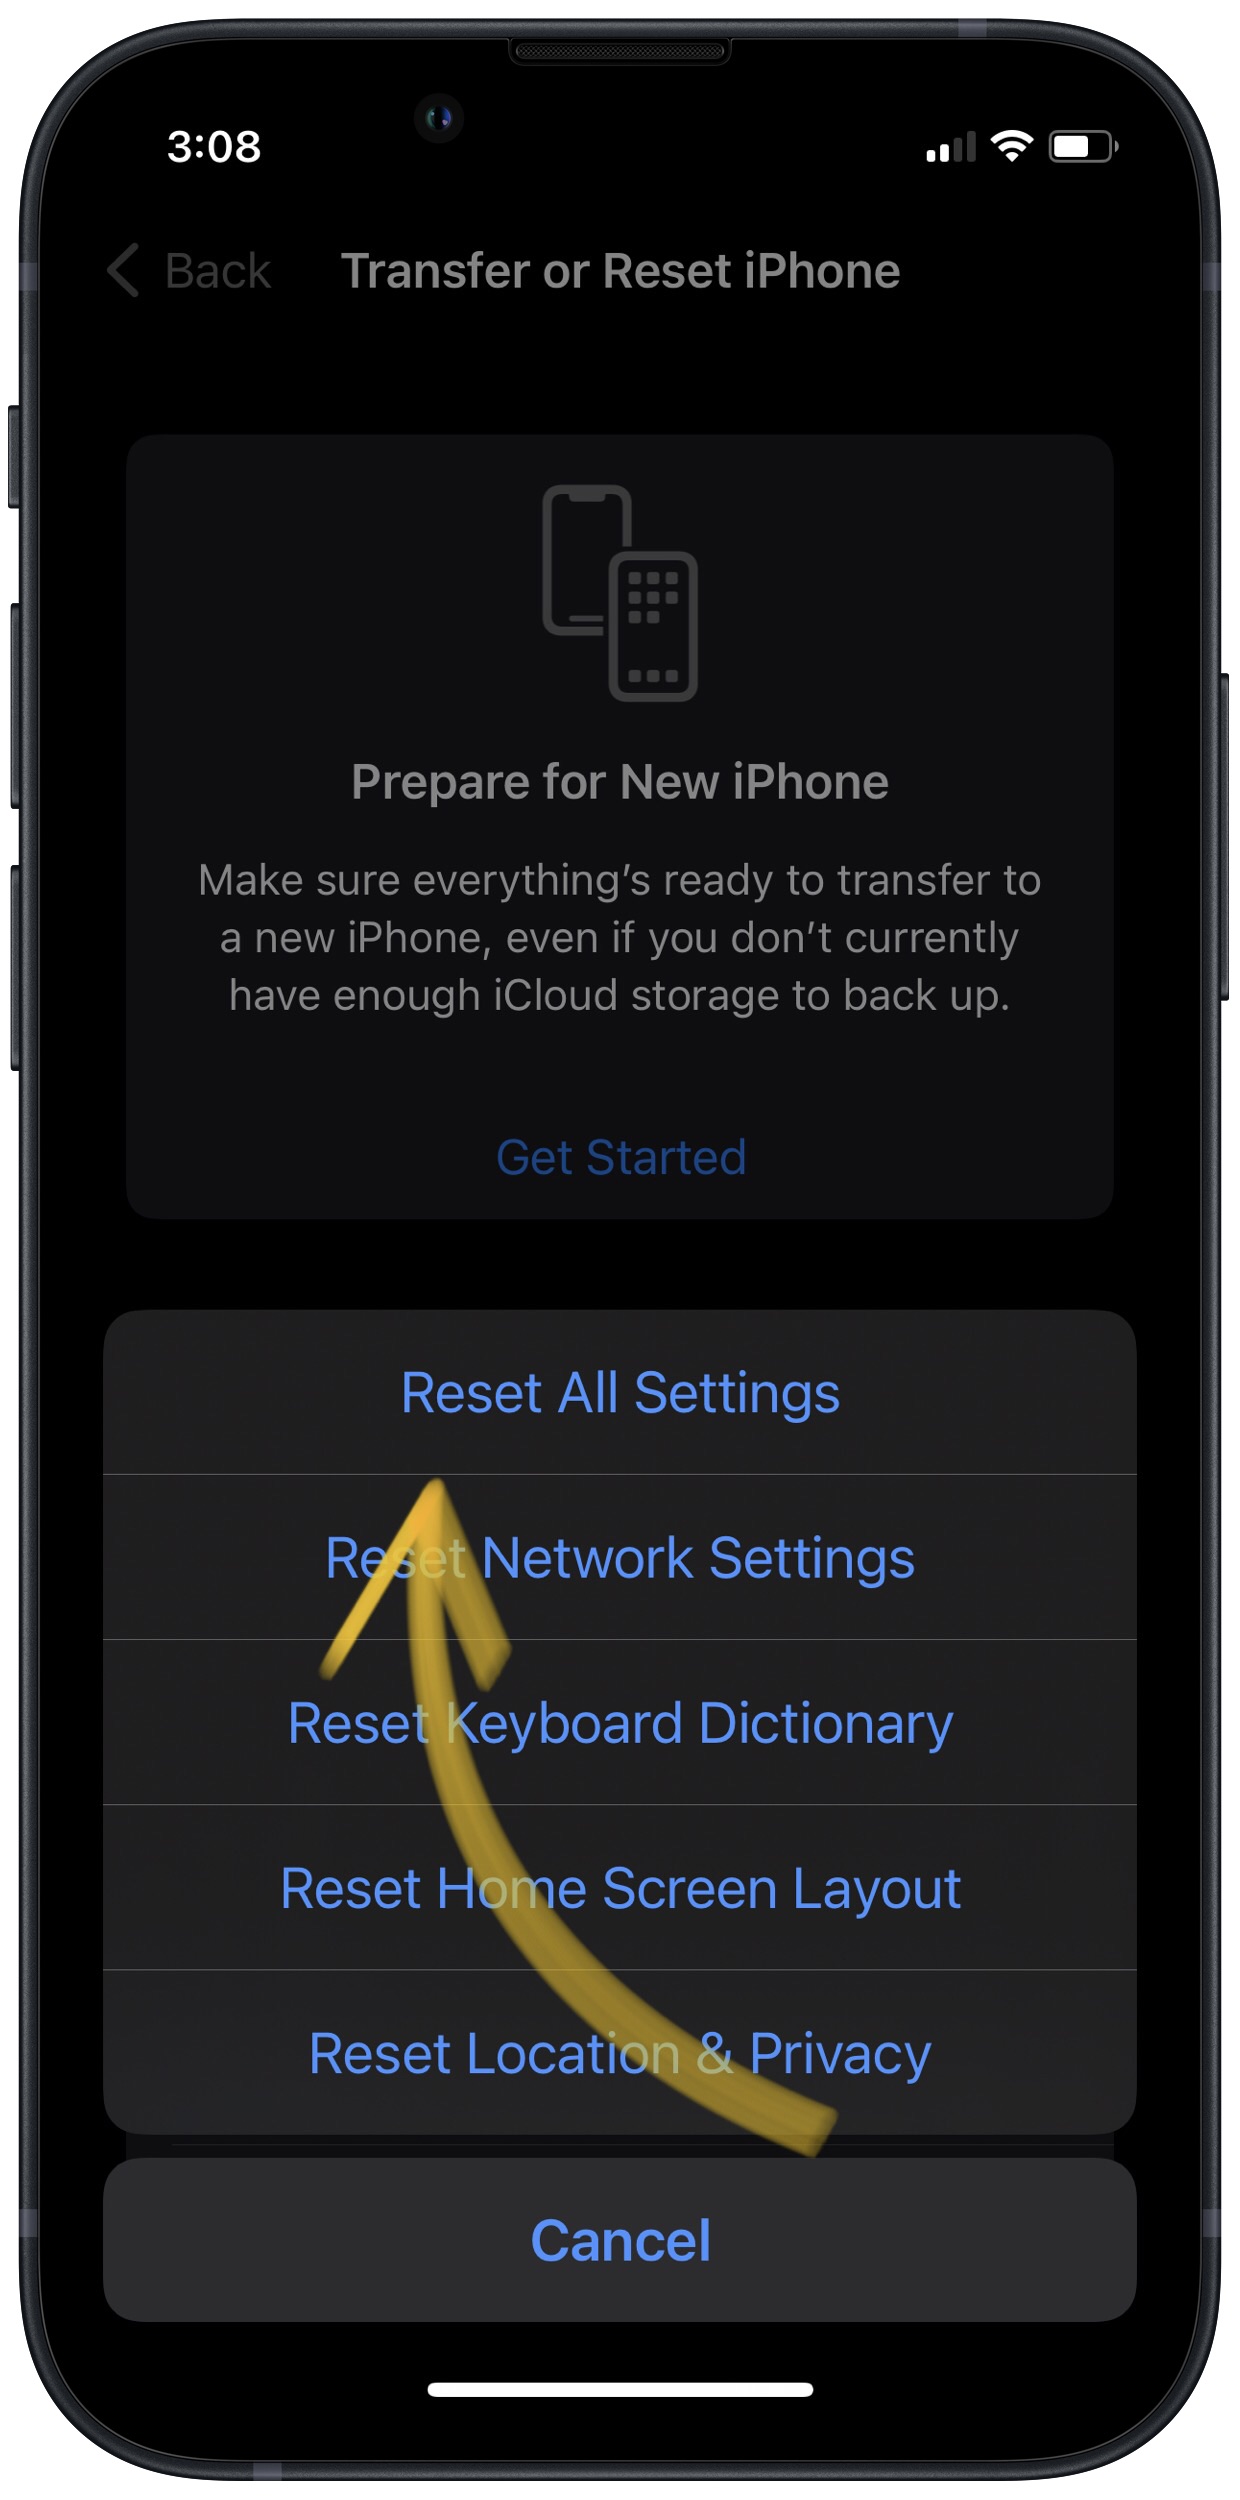
- Scroll down and tap Transfer Or Reset iPhone.
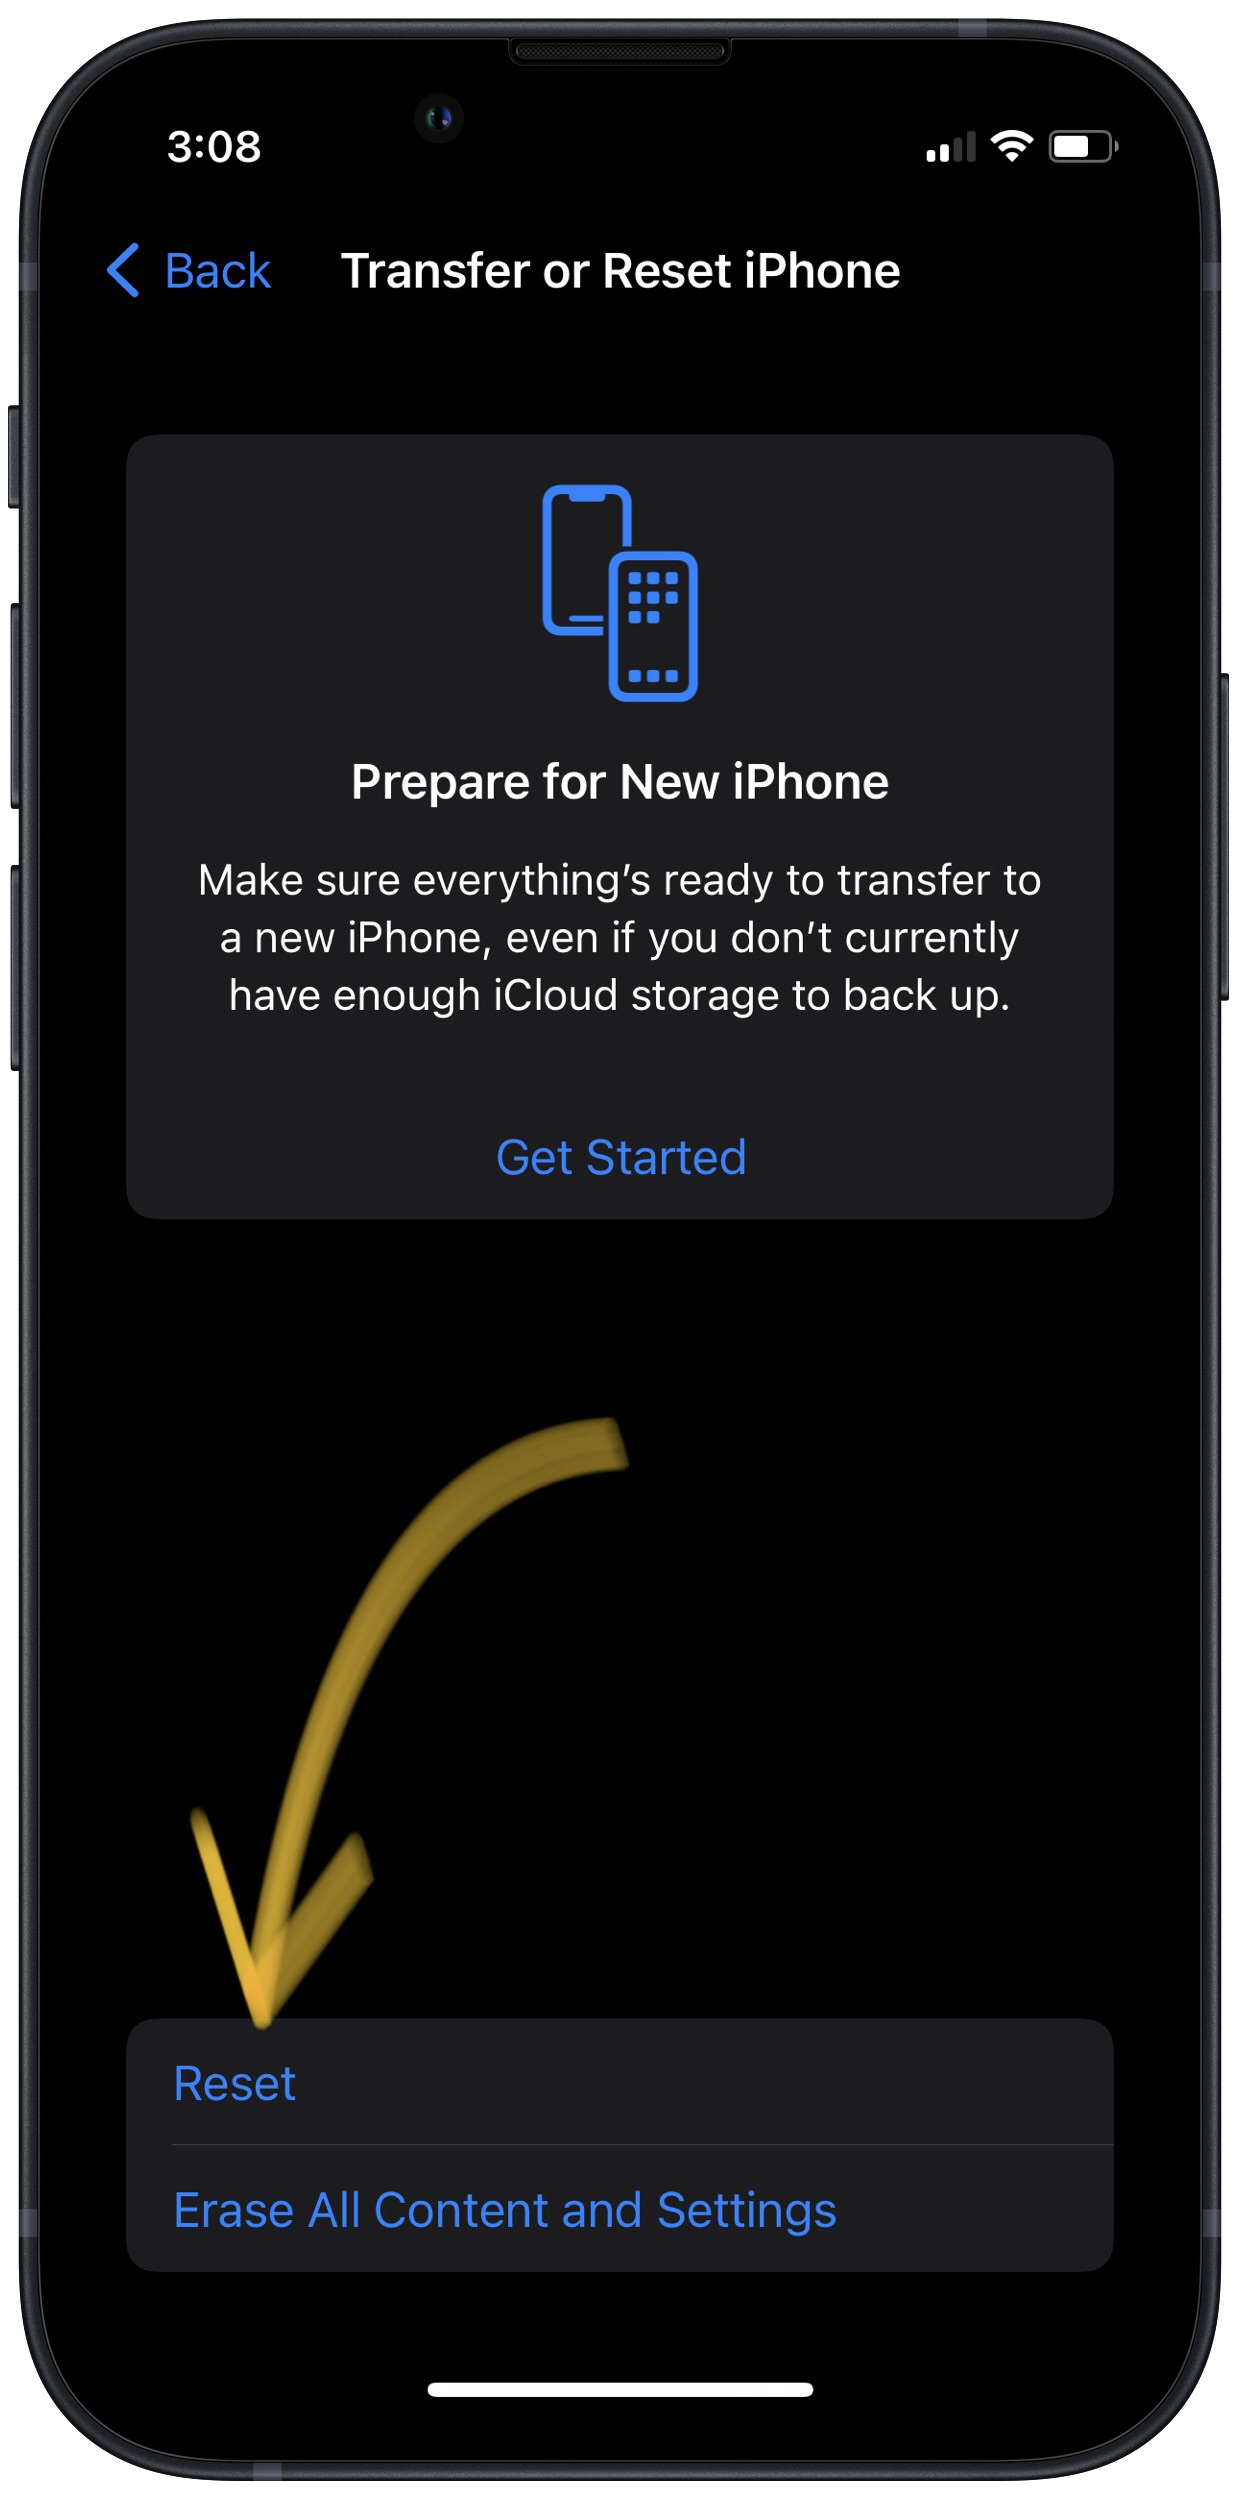
- Tap Reset.
- Tap Reset All Settings.
- Enter your passcode, if prompted.
- Tap Reset All Settings again to confirm your decision.
- Your iPhone will shut down, complete the reset, and turn itself on again will automatically turn back on when the reset finishes.
Applies To: iPhone 5,iPhone 5S,iPhone 5C,iPhone 6,iPhone 6 Plus,iPhone 6S,iPhone 6S Plus,iPhone SE,iPhone 7,iPhone 7 Plus,iPhone 8,iPhone 8 Plus,iPhone X,iPhone XS,iPhone XS Max,iPhone XR,iPhone 11,iPhone 11 Pro,iPhone 11 Pro Max,iPhone SE 2
View MoreBack Up Your iPhone
It's important to back up your iPhone before doing any major restores (such as a DFU restore). If something goes wrong while you're trying to fix your iPhone, having a back up means you won't lose any of your data (such as contacts, photos, apps, and more). Restoring from a back up is a lot more convenient than having to go and reenter all the information that was saved on your iPhone.
How Do I Back Up My iPhone?
There are a few different ways to back up your iPhone:
Backup Your iPhone Using iCloud
- If you have a WiFi connection, you can back up your iPhone using iCloud.
- Open the Settings app.
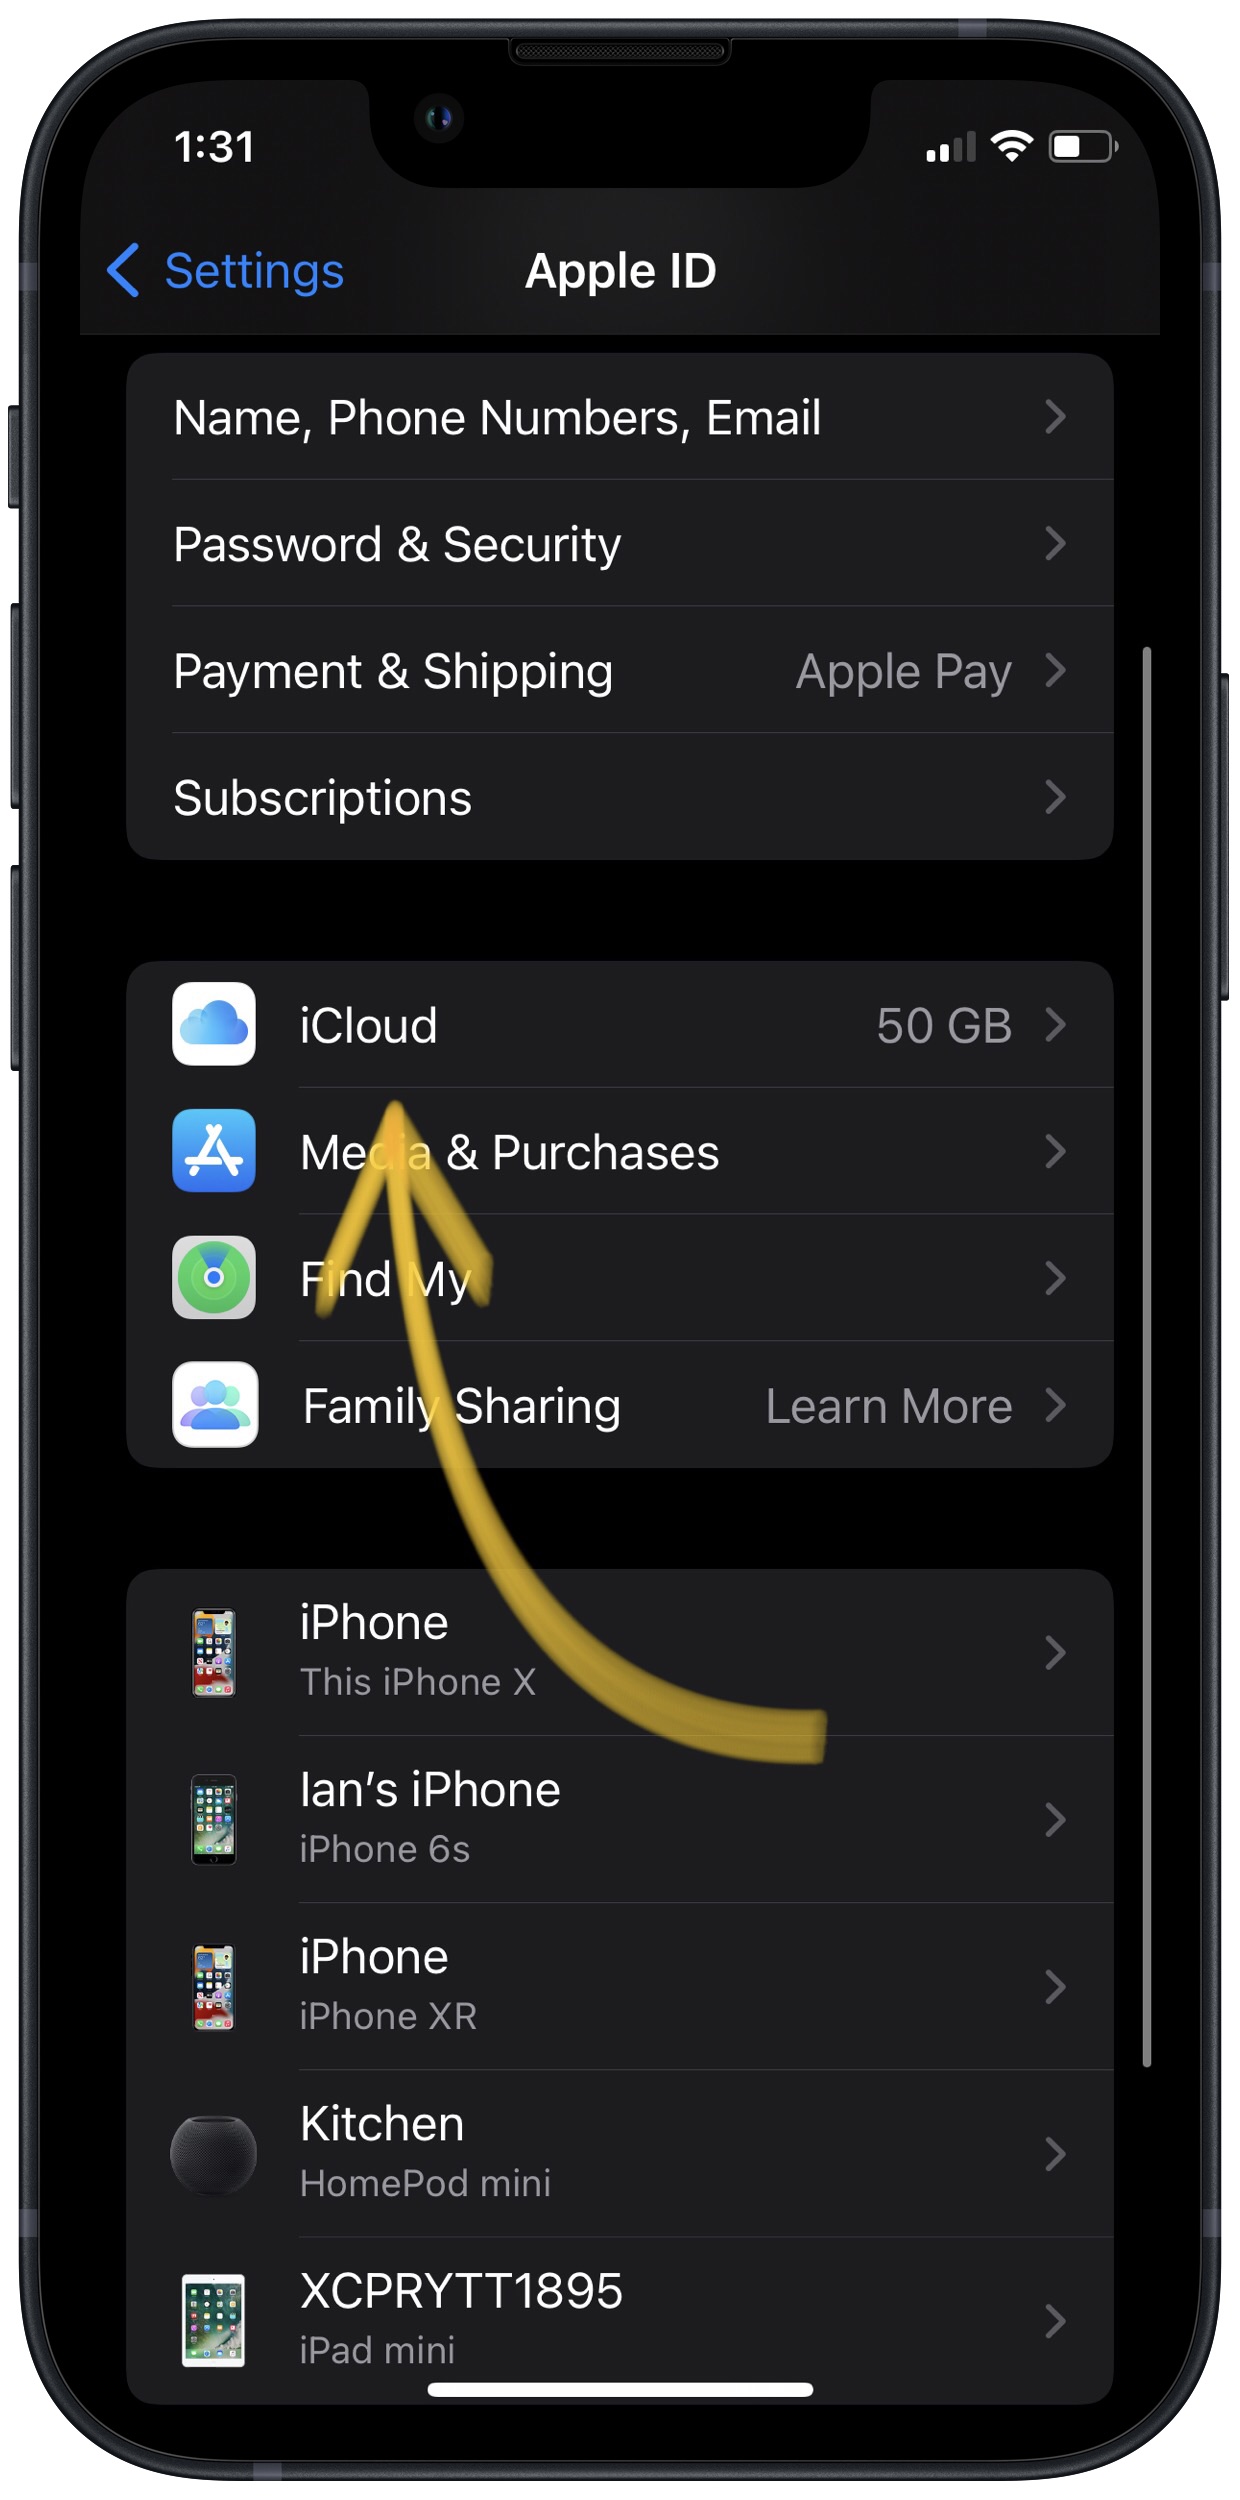
- Tap on Your Name at the top of the screen.
- Tap iCloud.
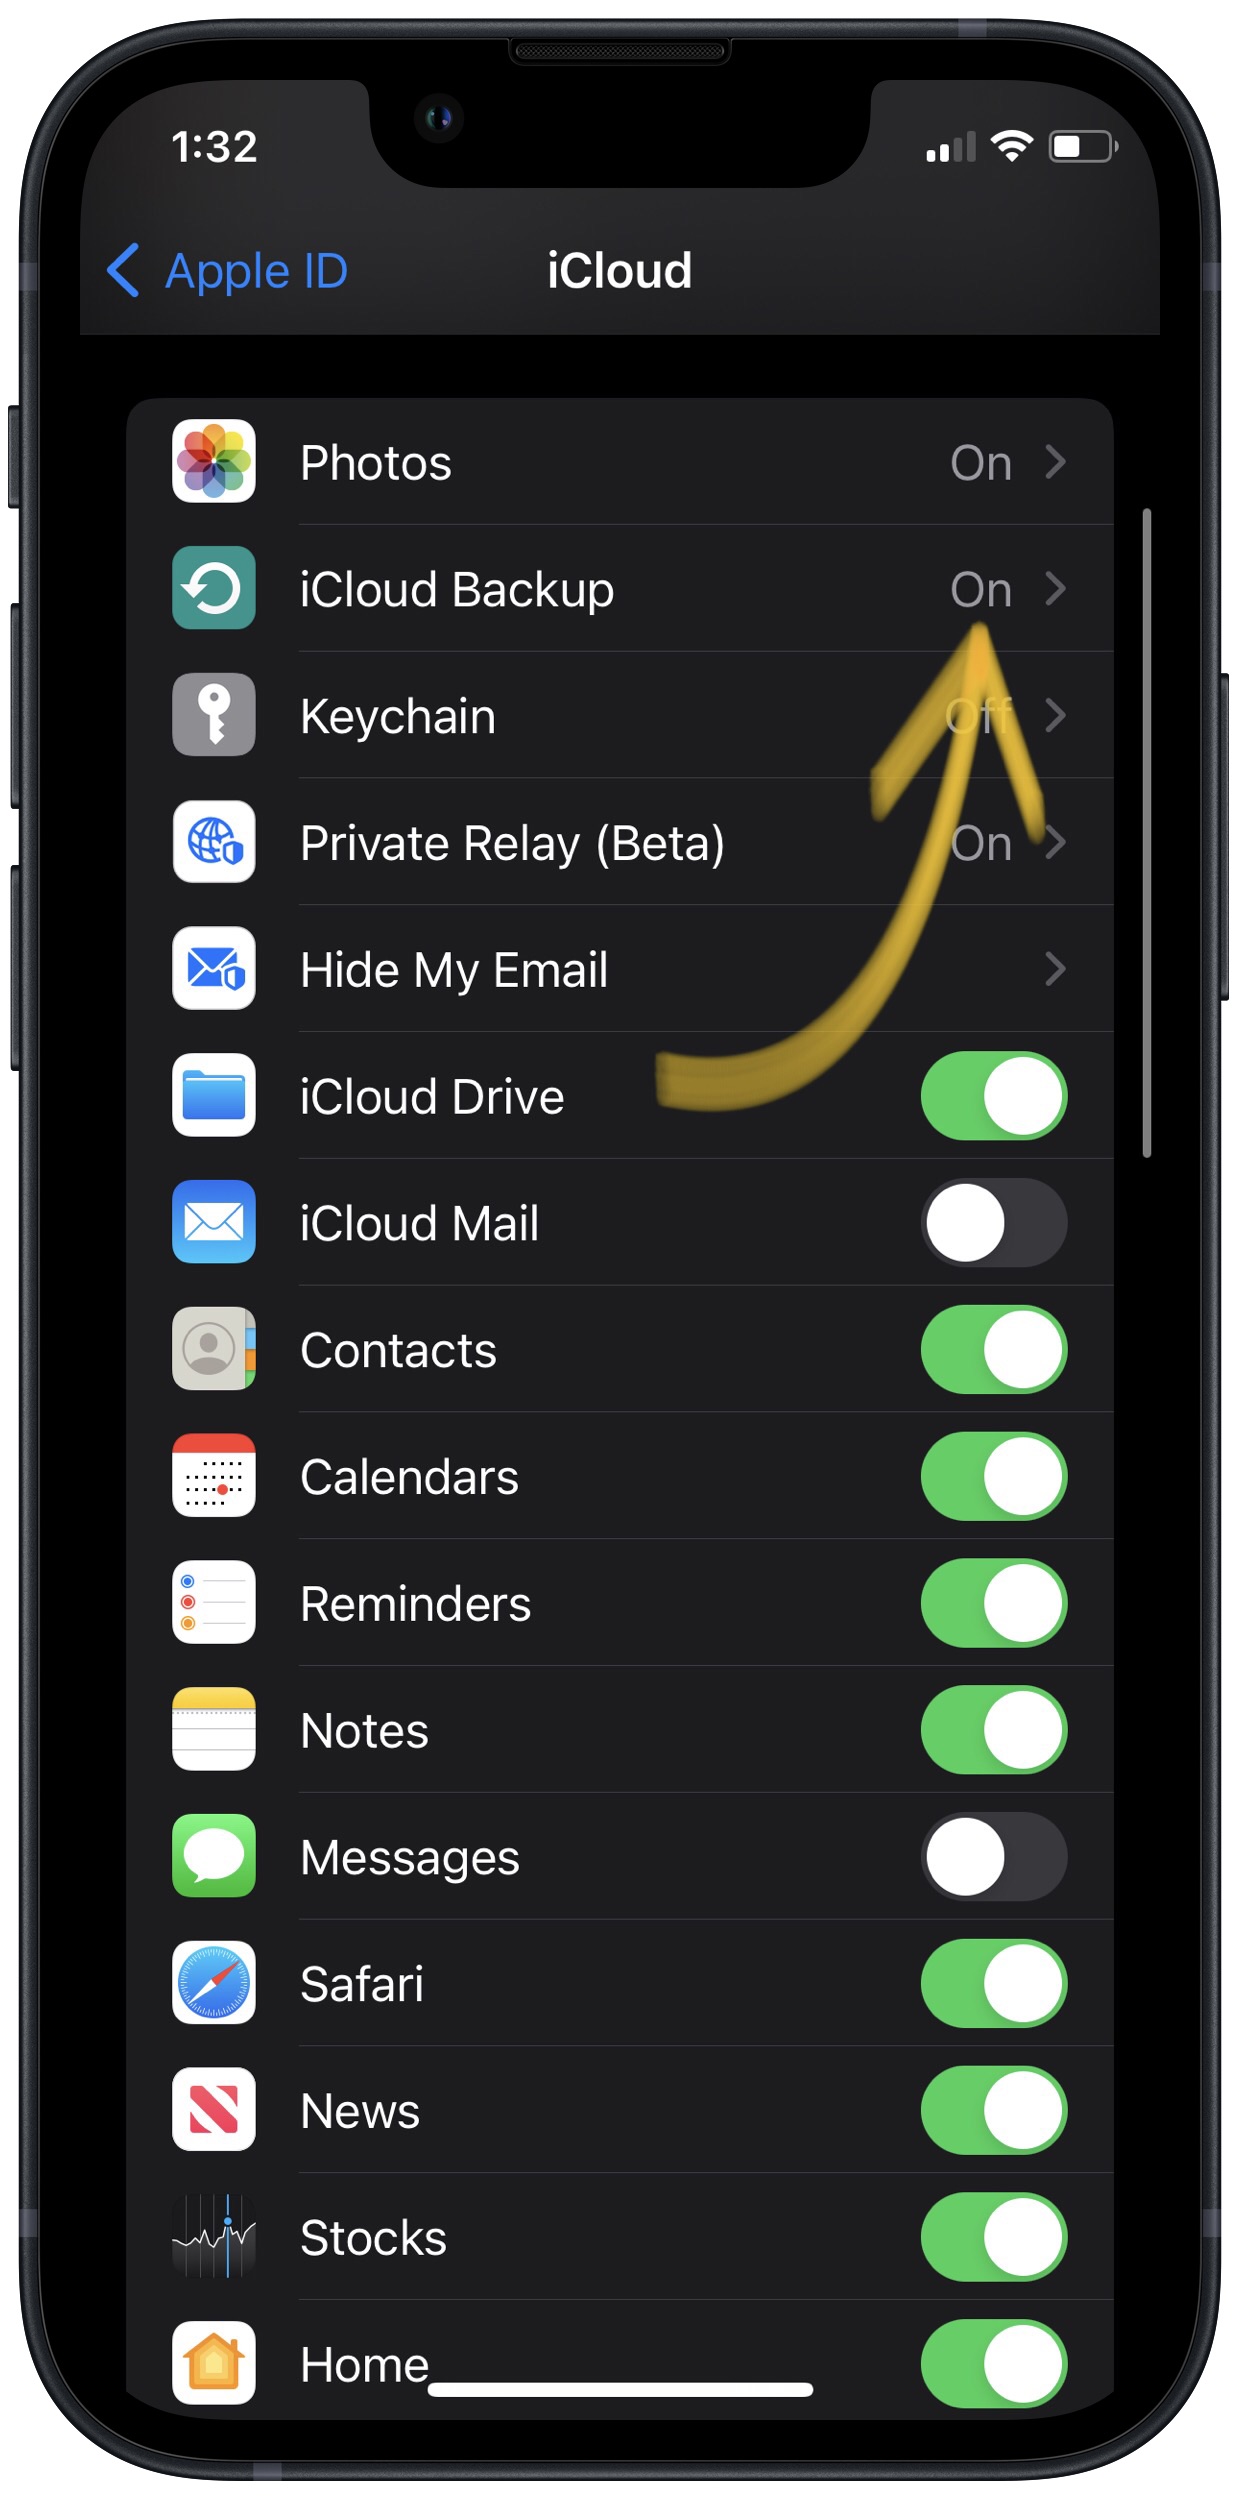
- Scroll down and tap on iCloud Backup.
- Make sure the switch next to iCloud Backup is on. You'll know the switch is on when the switch is green.
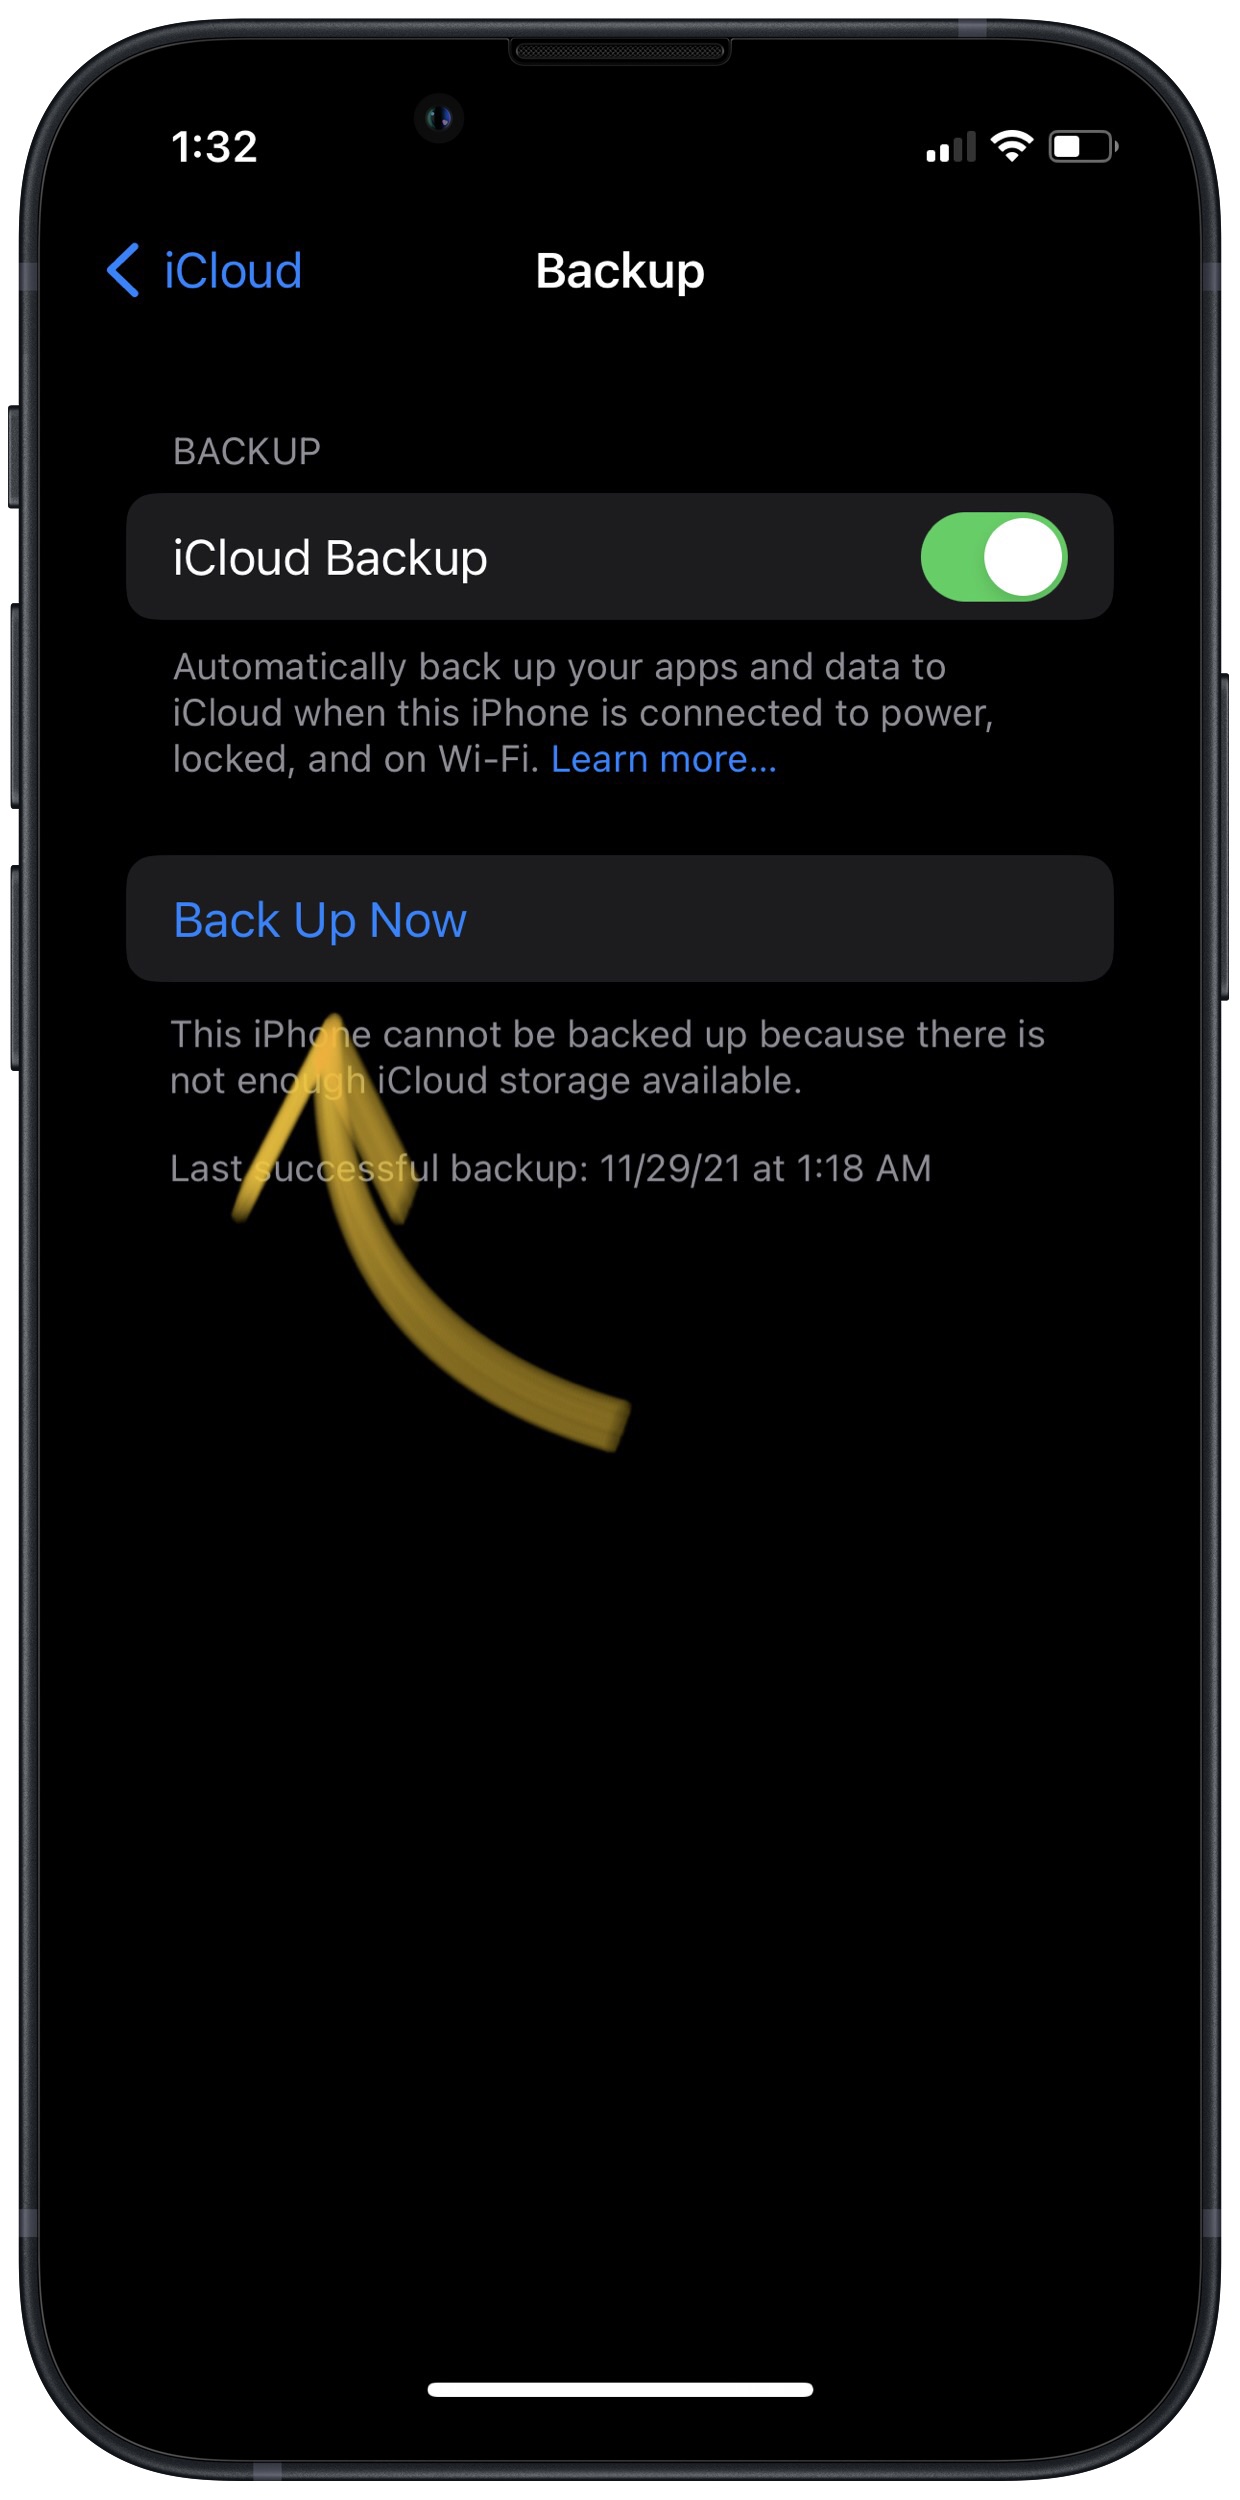
- Tap Back Up Now.
- A status bar will appear to tell you how much time is remaining.
Backup Your iPhone Using iTunes
- Plug the Lightning connector on your Lightning cable (charging cable) into the Lightning port on your iPhone.
- Plug the other end of your Lightning cable into a USB port on your computer.
- Open iTunes on your computer.
- Click on the iPhone icon in the upper left hand corner of iTunes.
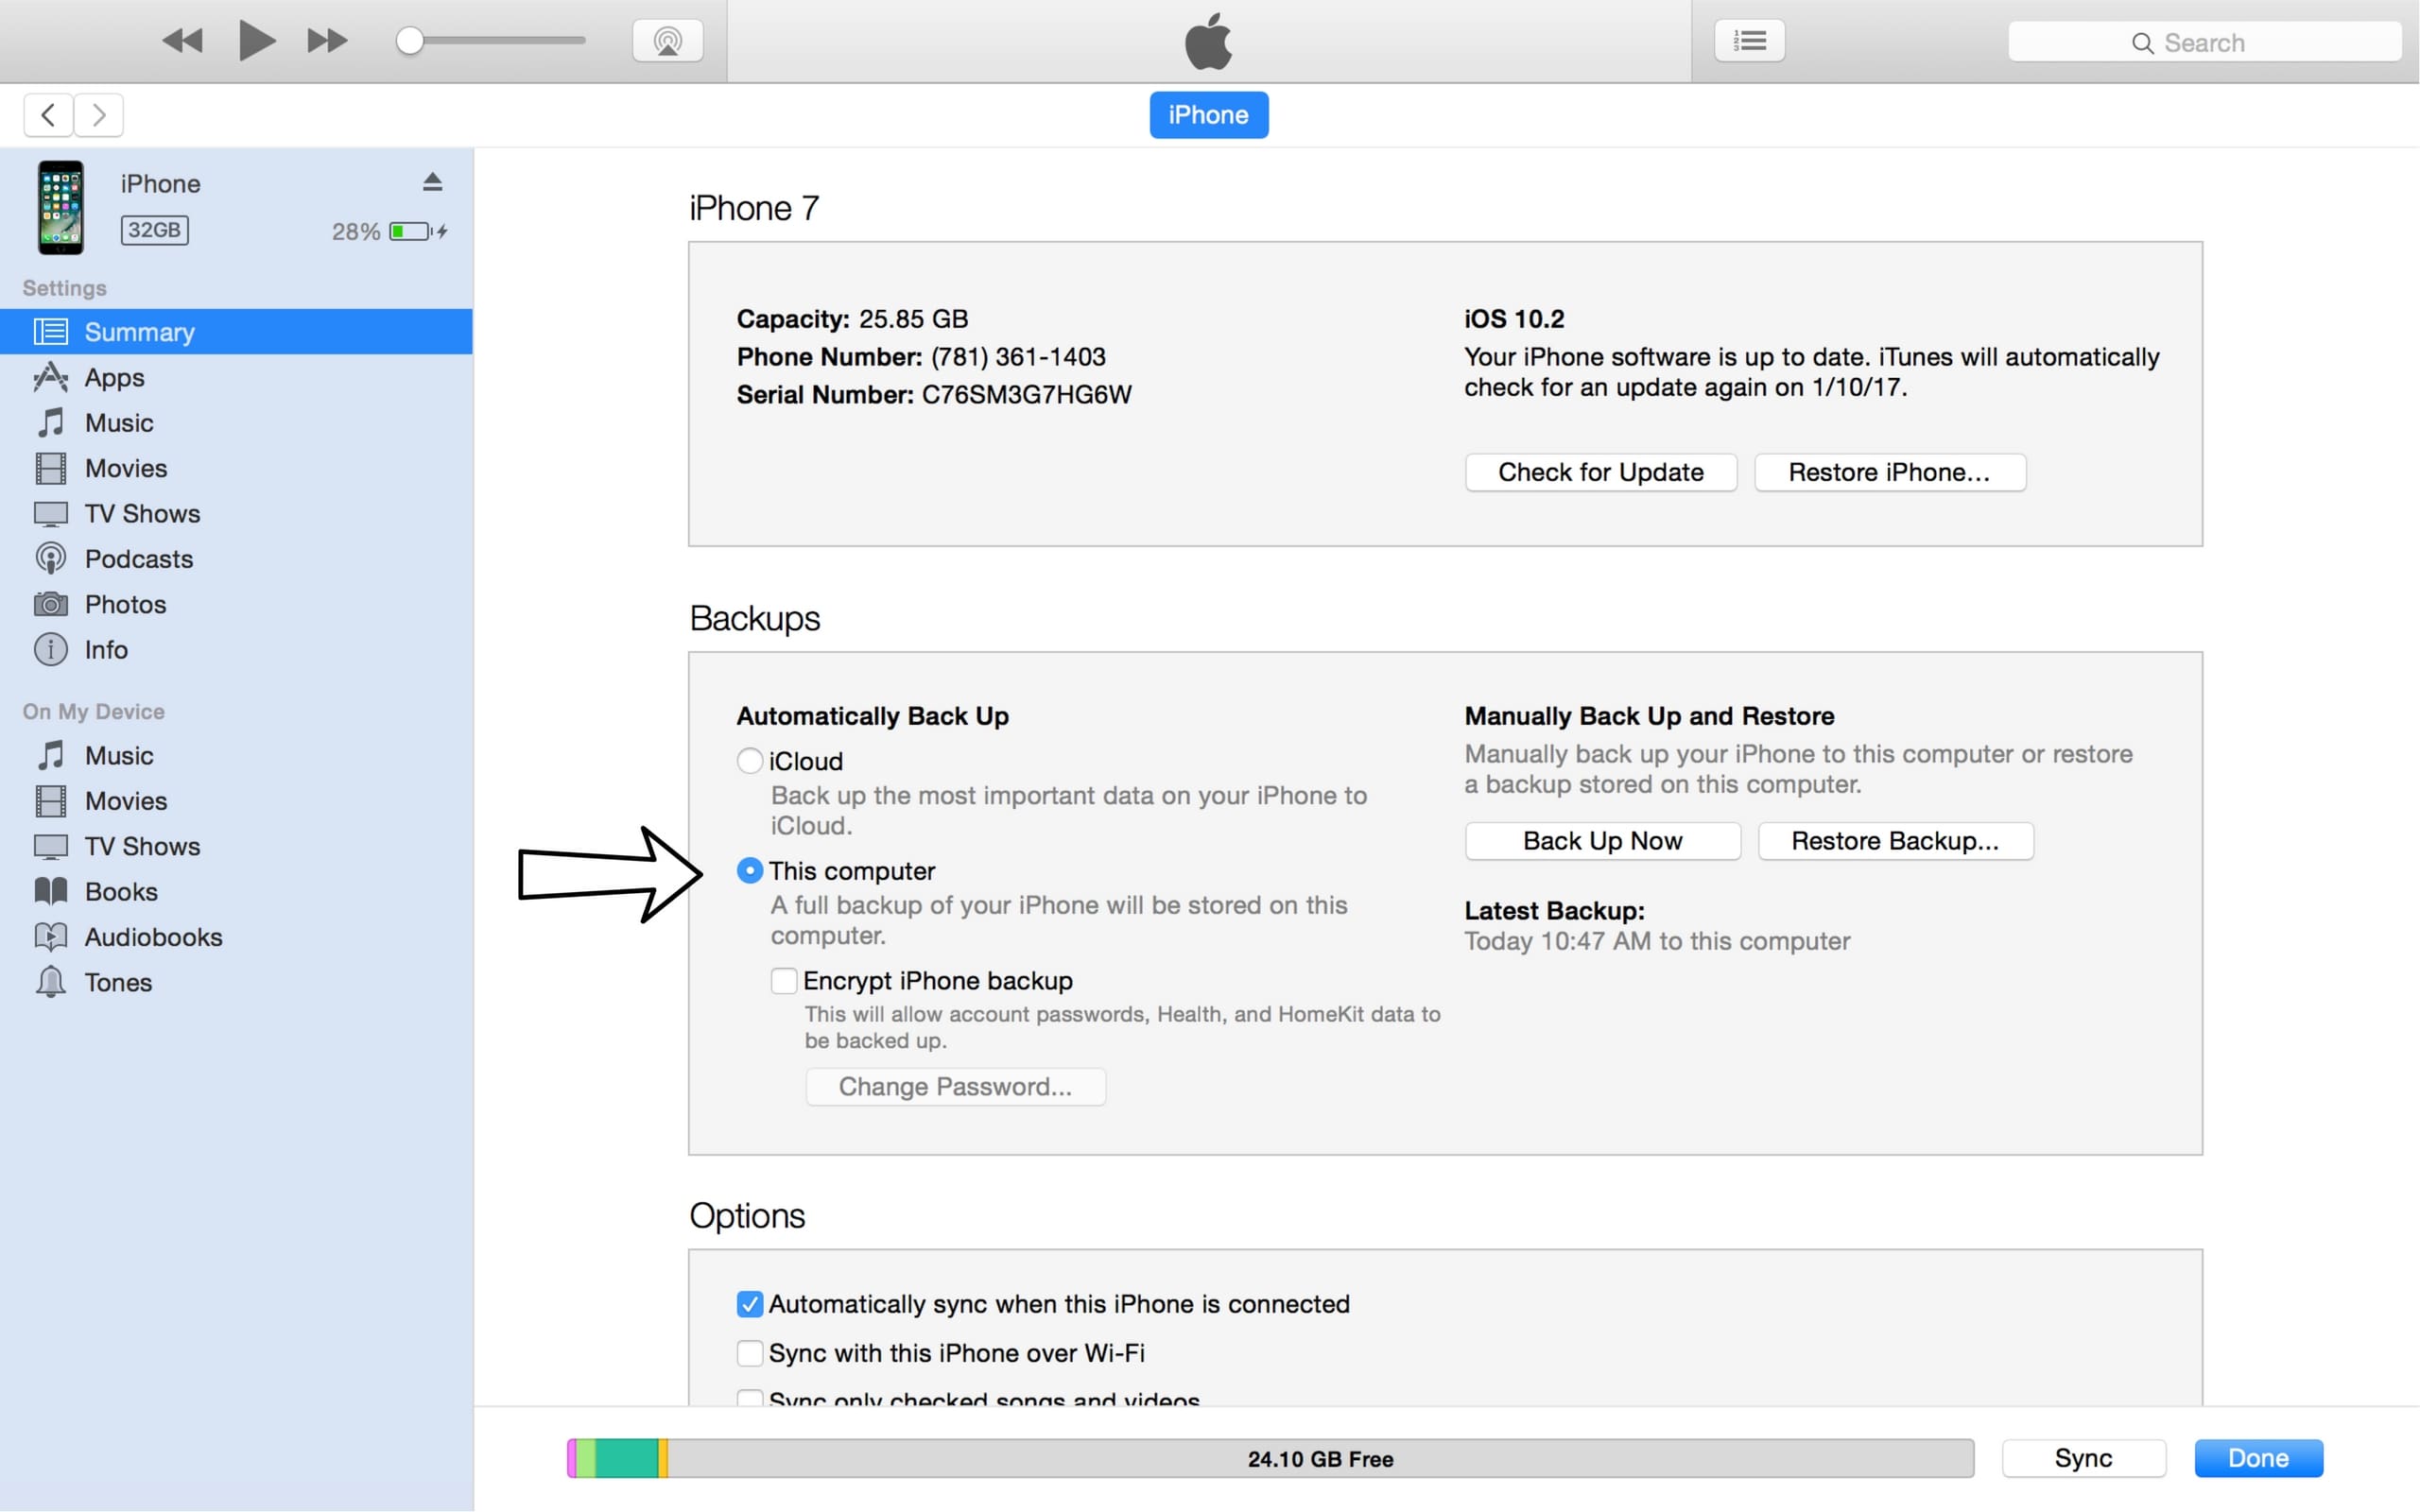
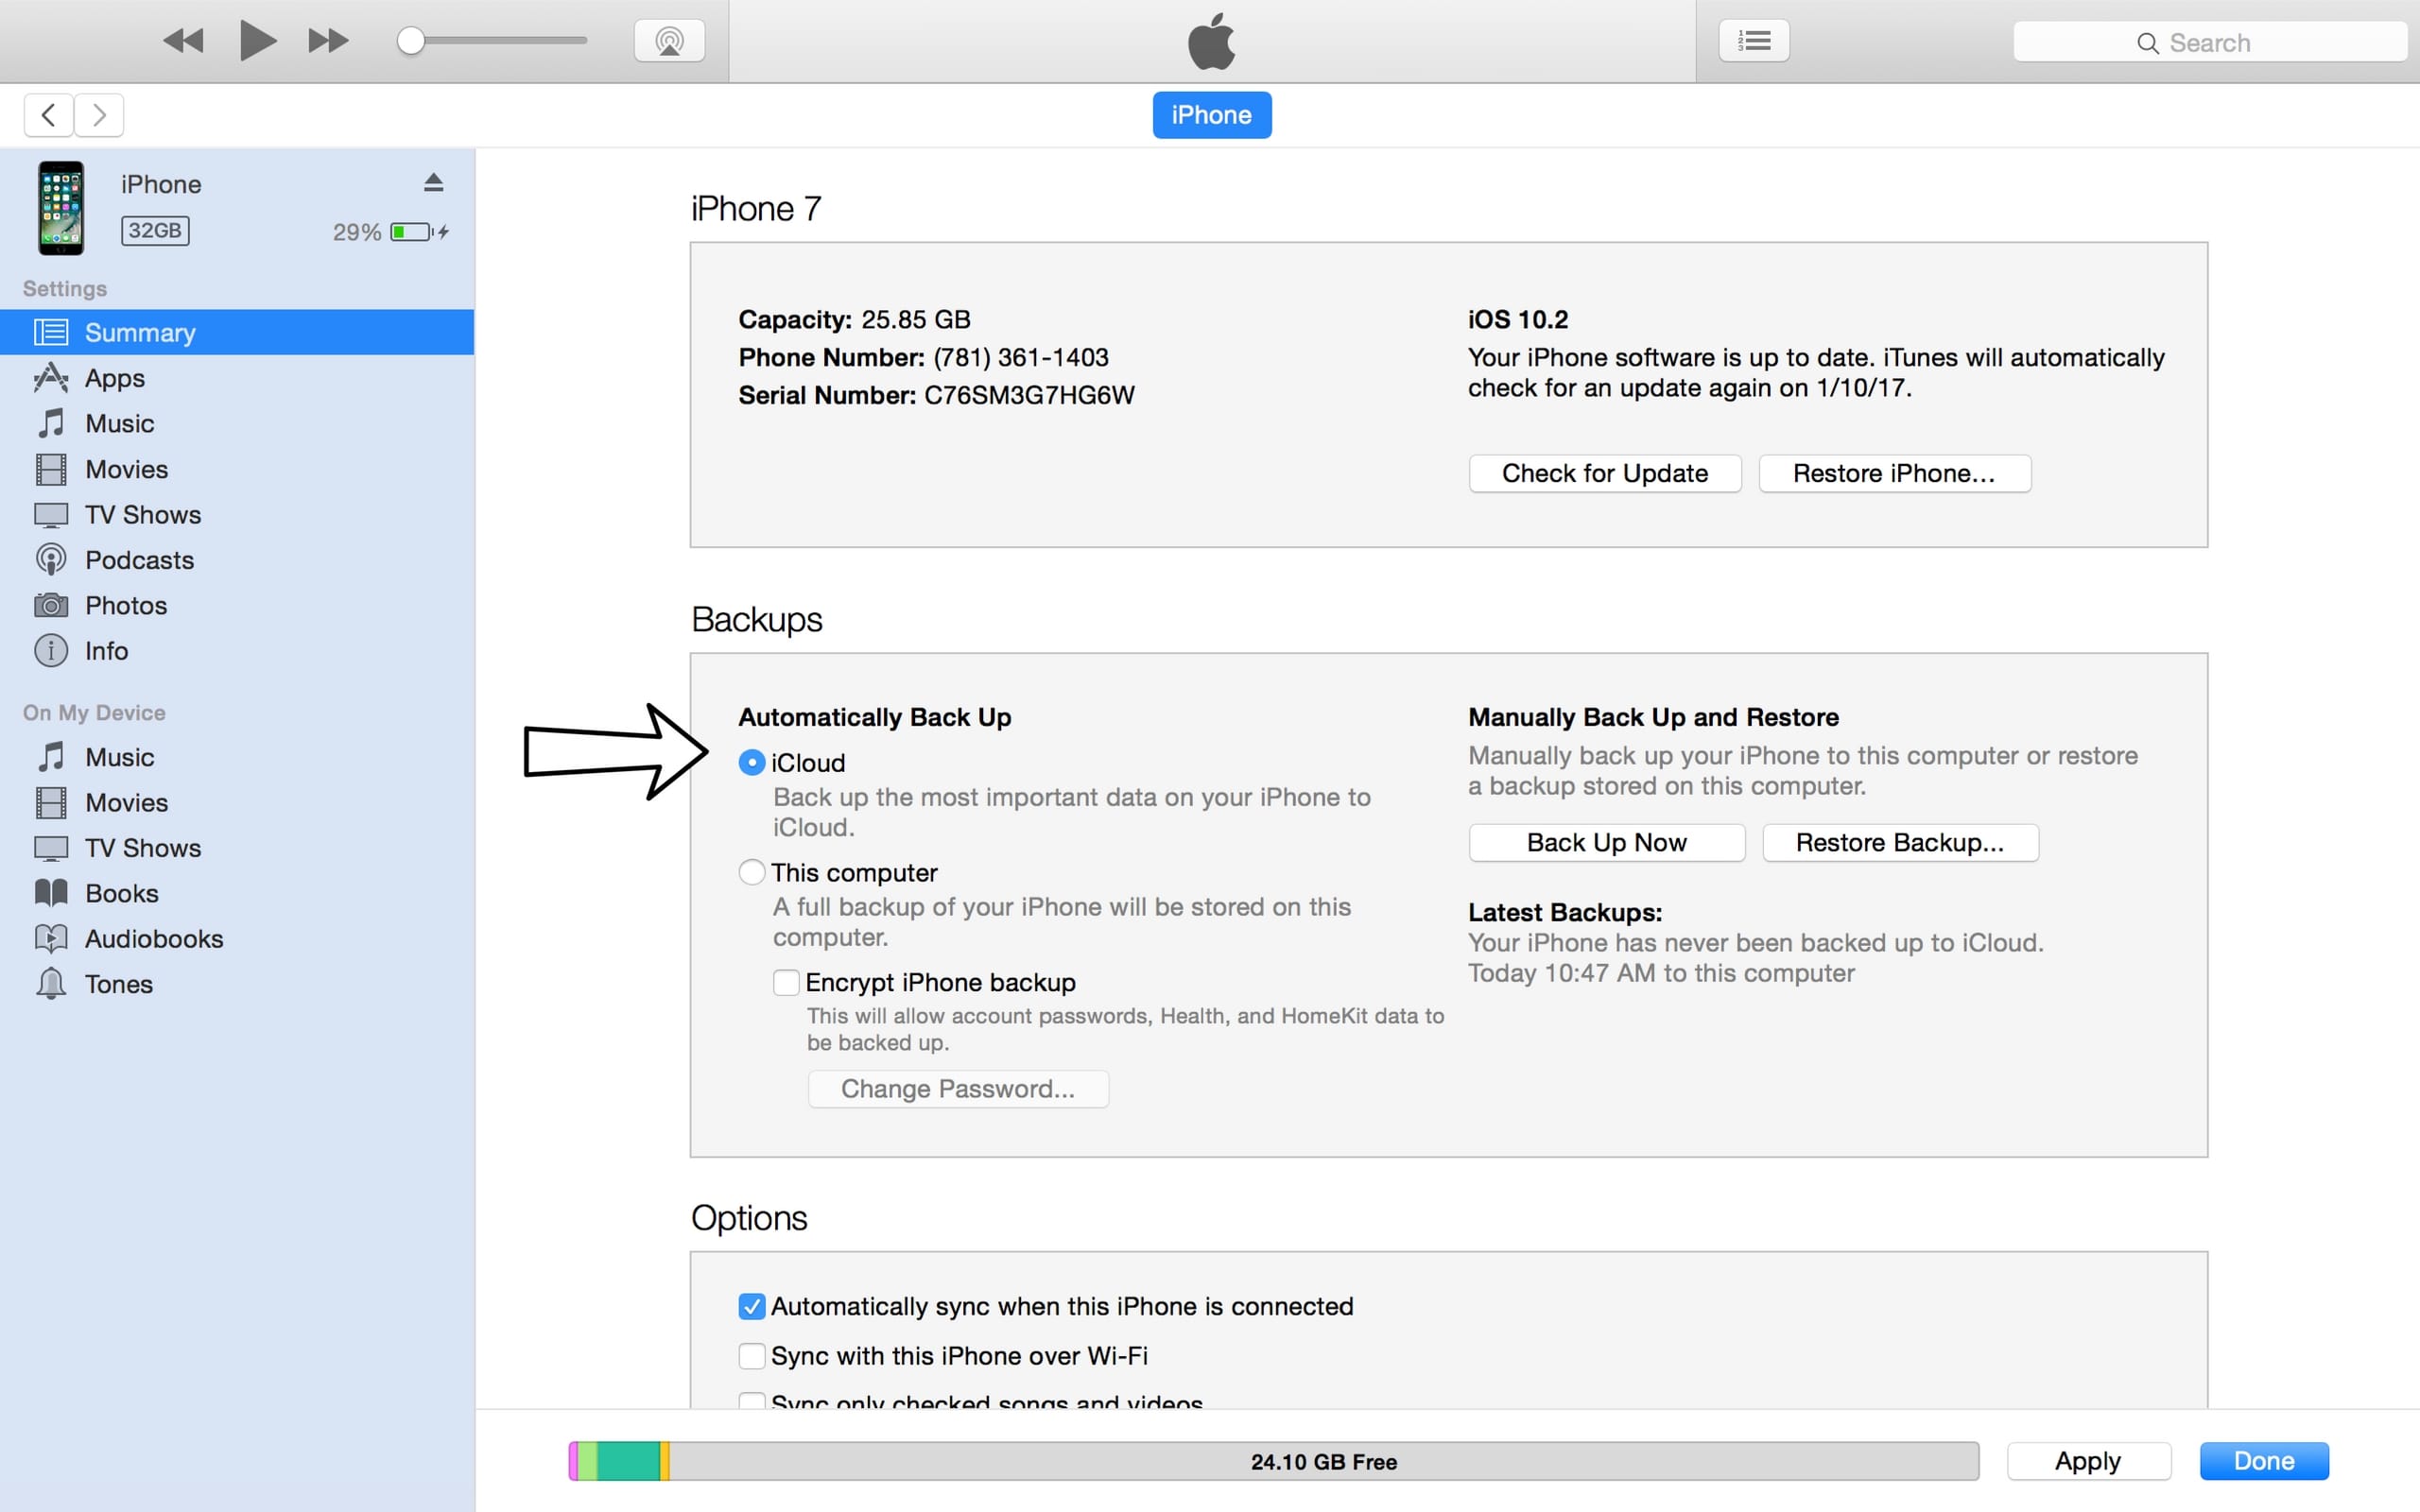
- Click the circle next to "iCloud" or "This computer" to select whether you want to backup your iPhone to iCloud or your computer.
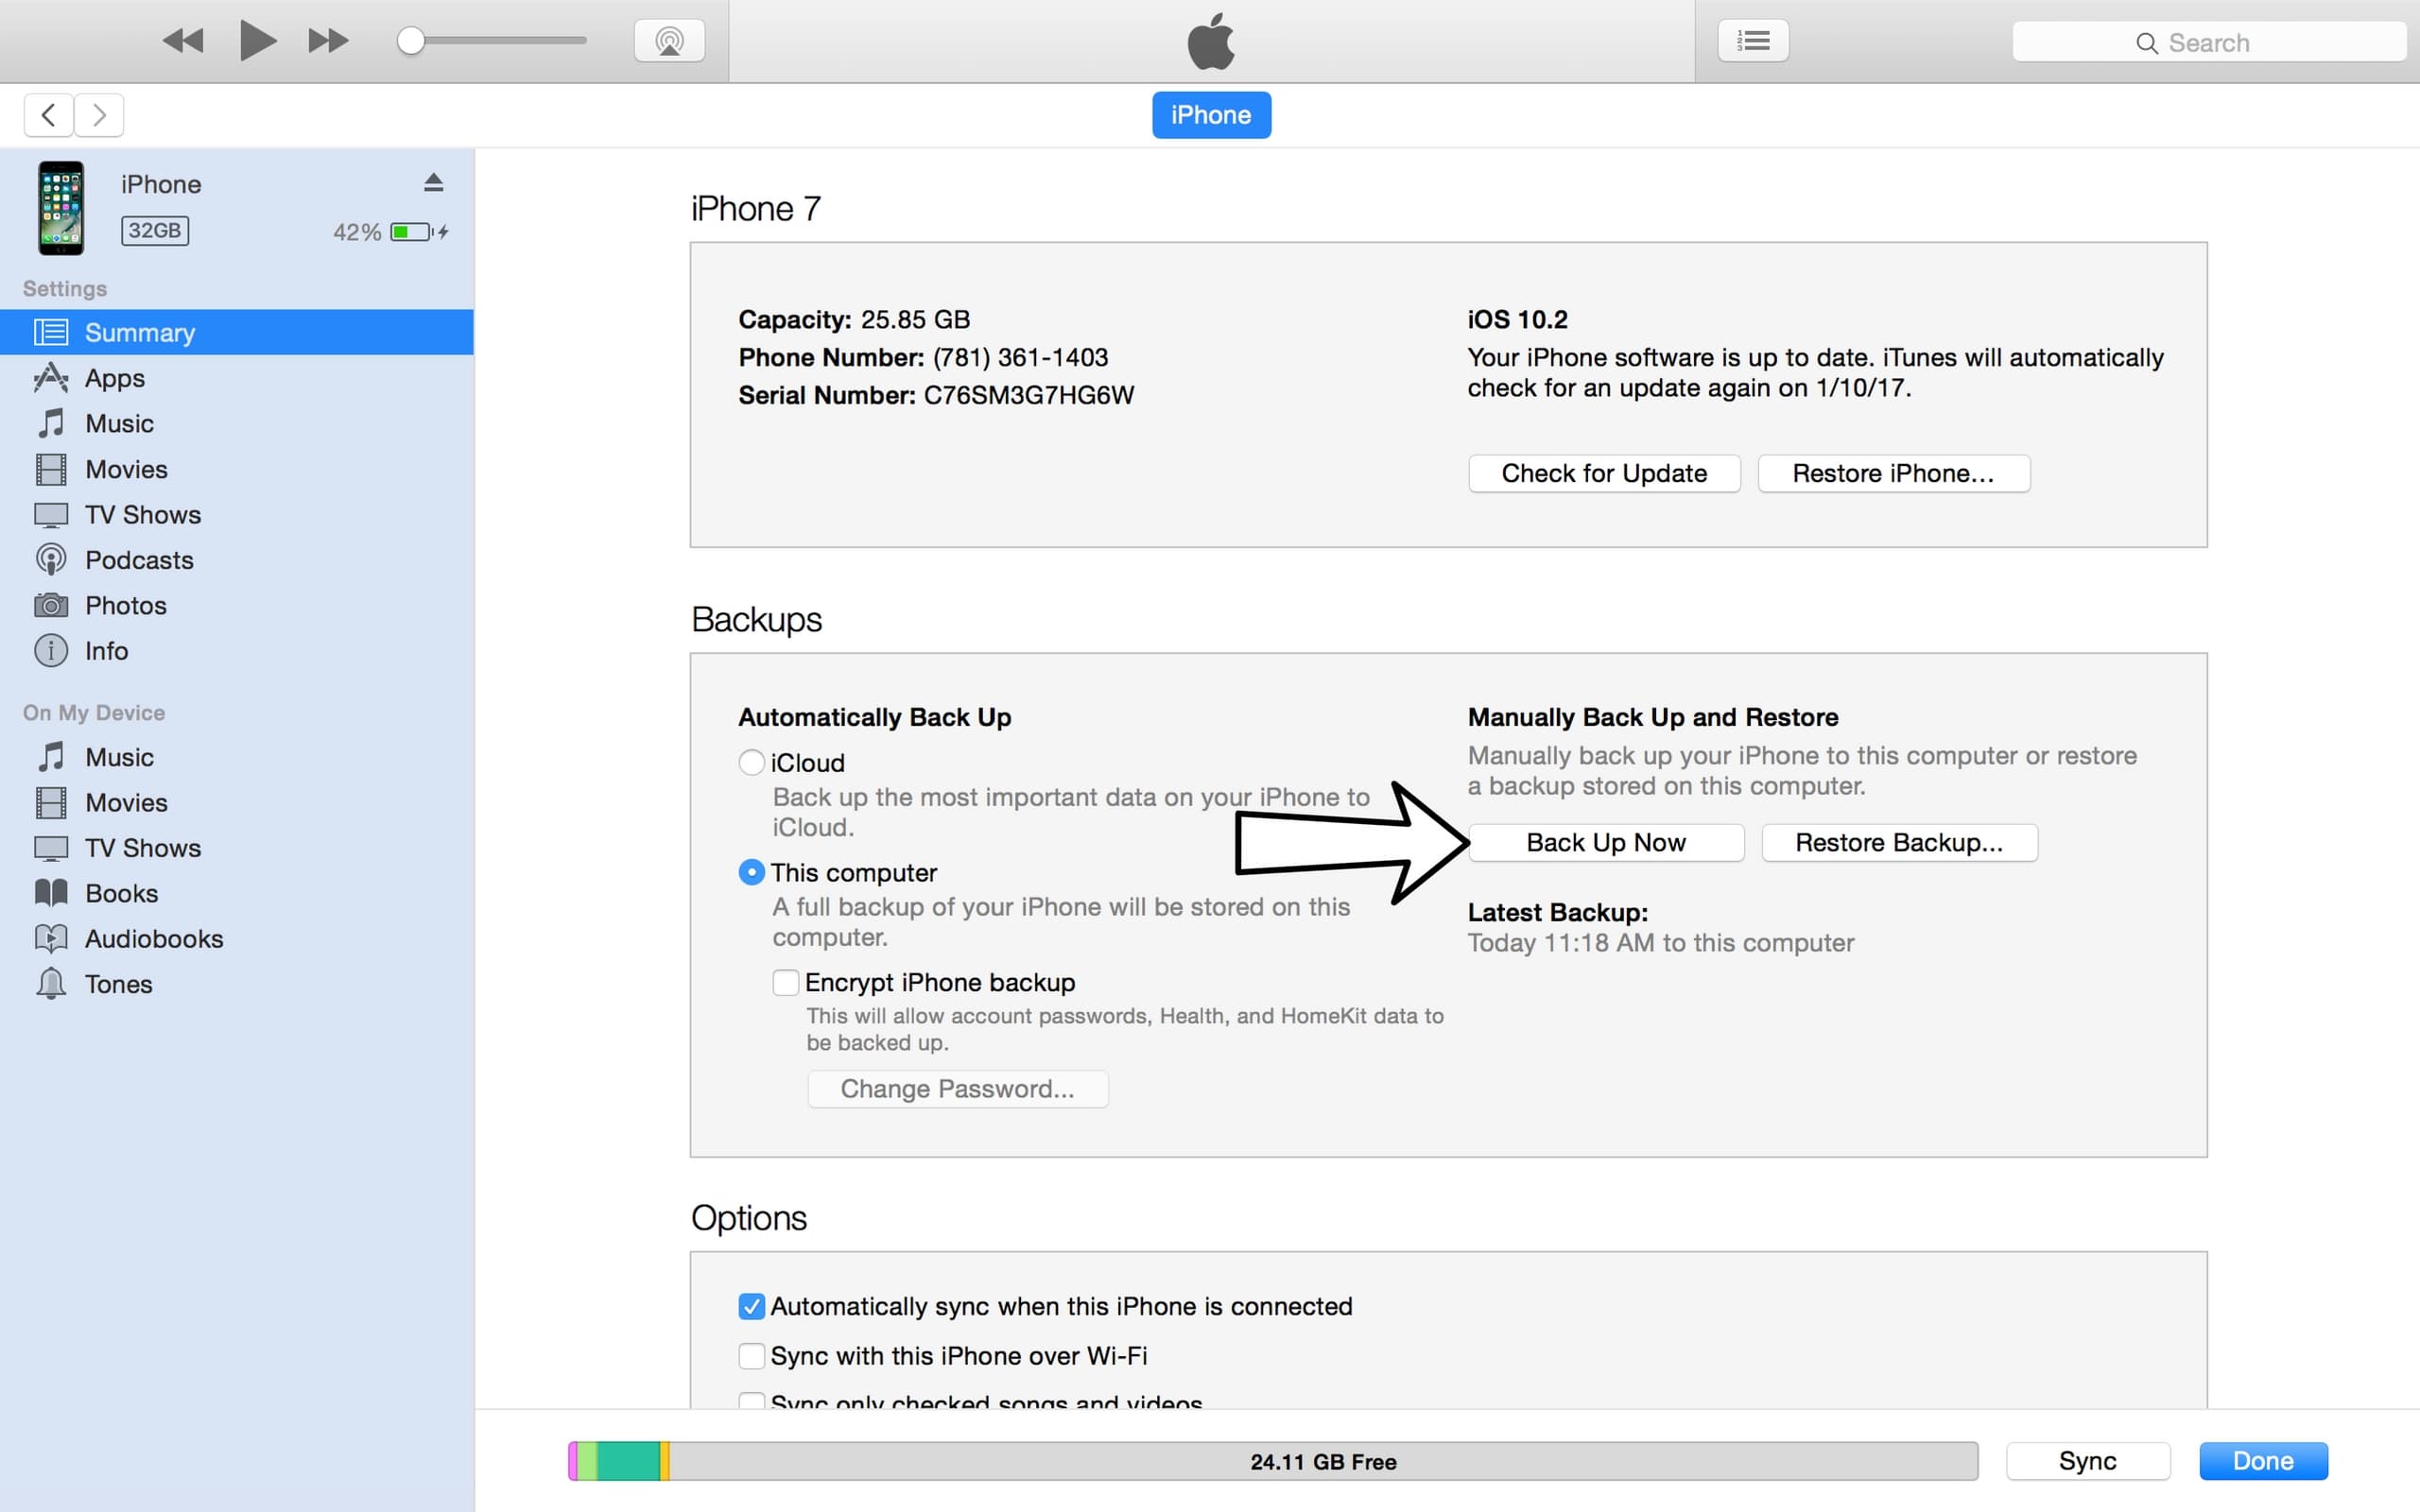
- Click Back Up Now to backup your iPhone.
- When the backup is complete, you'll see the time and date updated under Latest Backup.
Backup Your iPhone Using Finder (Macs Running Catalina 10.15 or newer)
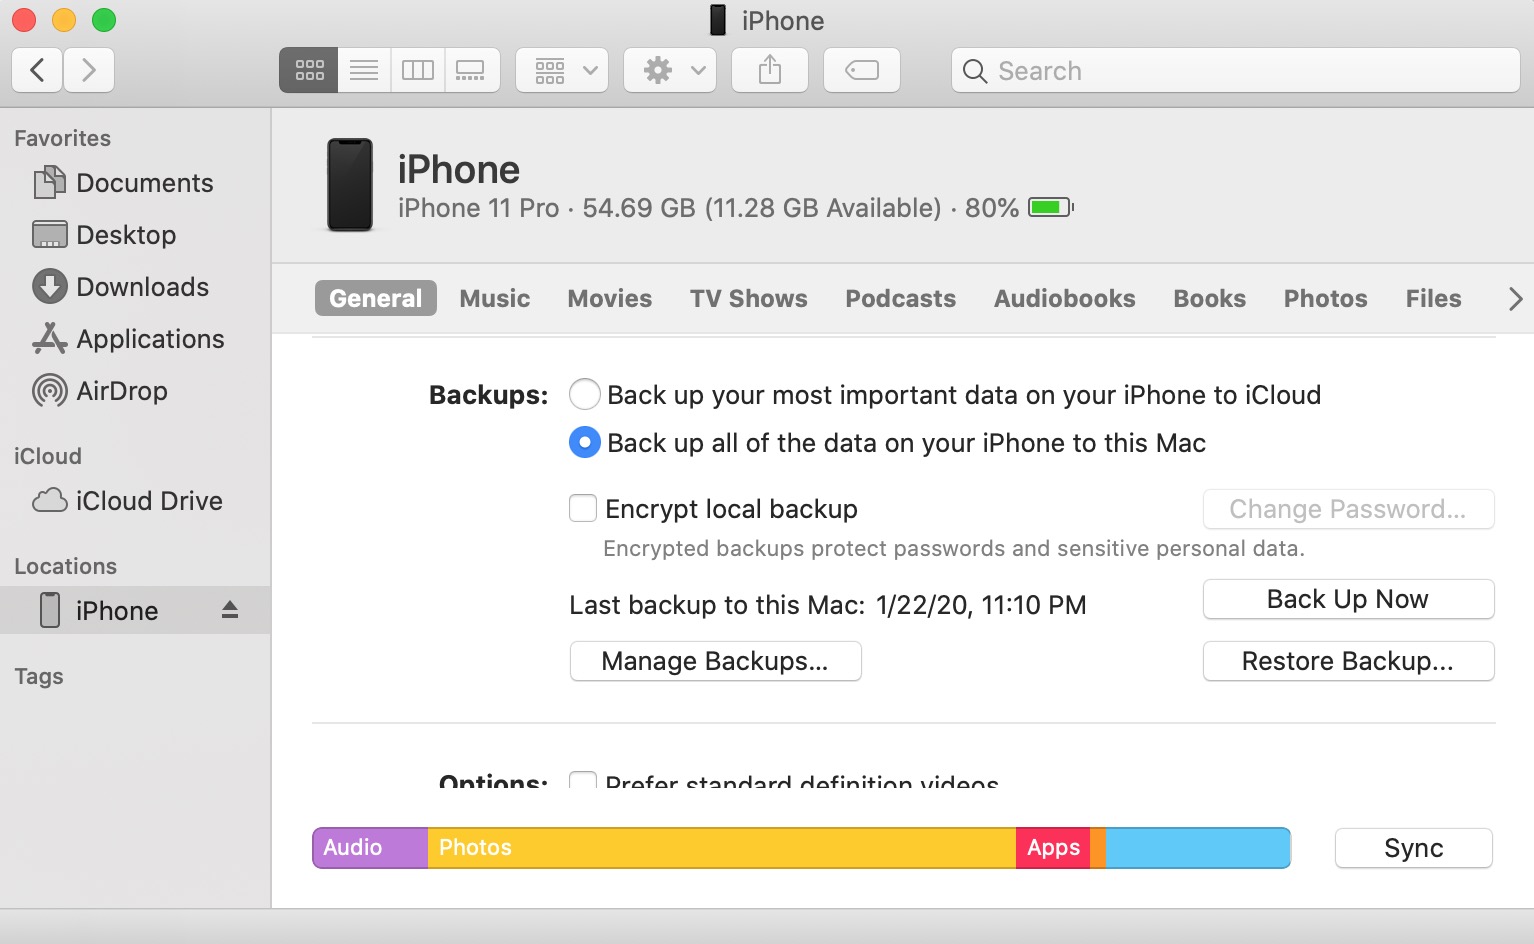
- Connect your iPhone to your Mac using a charging cable.
- Open Finder.
- Click on your iPhone under Locations.
- Click the circle next to Back up all of the data on your iPhone to this Mac.
- Click Back Up Now.
- When the backup is complete, you'll see the time and date updated under Latest Backup.
Applies To: iPhone 5,iPhone 5S,iPhone 5C,iPhone 6,iPhone 6 Plus,iPhone 6S,iPhone 6S Plus,iPhone SE,iPhone 7,iPhone 7 Plus,iPhone 8,iPhone 8 Plus,iPhone X,iPhone XS,iPhone XS Max,iPhone XR,iPhone 11,iPhone 11 Pro,iPhone 11 Pro Max,iPhone SE 2
View MorePut Your iPhone In DFU Mode
A DFU restore is the last troubleshooting step you can take to rule out a software problem on your iPhone.
Watch our step-by-step DFU restore guide on YouTube, or follow the steps below:
- Plug your iPhone in a computer.
- Open iTunes (on PCs or Macs running macOS Mojave 10.14 or earlier) or Finder (Macs running macOS Catalina 10.15 or newer).
- Press and release the volume up button.
- Press and release the volume down button.
- Press and hold the side button until your iPhone's display goes black.
- When the screen turns black, press and hold the volume down button while continuing to hold the side button.
- Hold both buttons for five seconds.
- After five seconds, release the side button, but continue to hold the volume down button.
- Release the volume down button when your iPhone appears in iTunes or Finder.
- Your iPhone appears in iTunes or Finder, it's in DFU mode!
- Click Restore and follow the on-screen prompts to DFU restore your iPhone.
Applies To: iPhone 5,iPhone 5S,iPhone 5C,iPhone 6,iPhone 6 Plus,iPhone 6S,iPhone 6S Plus,iPhone SE,iPhone 7,iPhone 7 Plus,iPhone 8,iPhone 8 Plus,iPhone X,iPhone XS,iPhone XS Max,iPhone XR,iPhone 11,iPhone 11 Pro,iPhone 11 Pro Max,iPhone SE 2
View MoreRepair Your iPhone With Apple
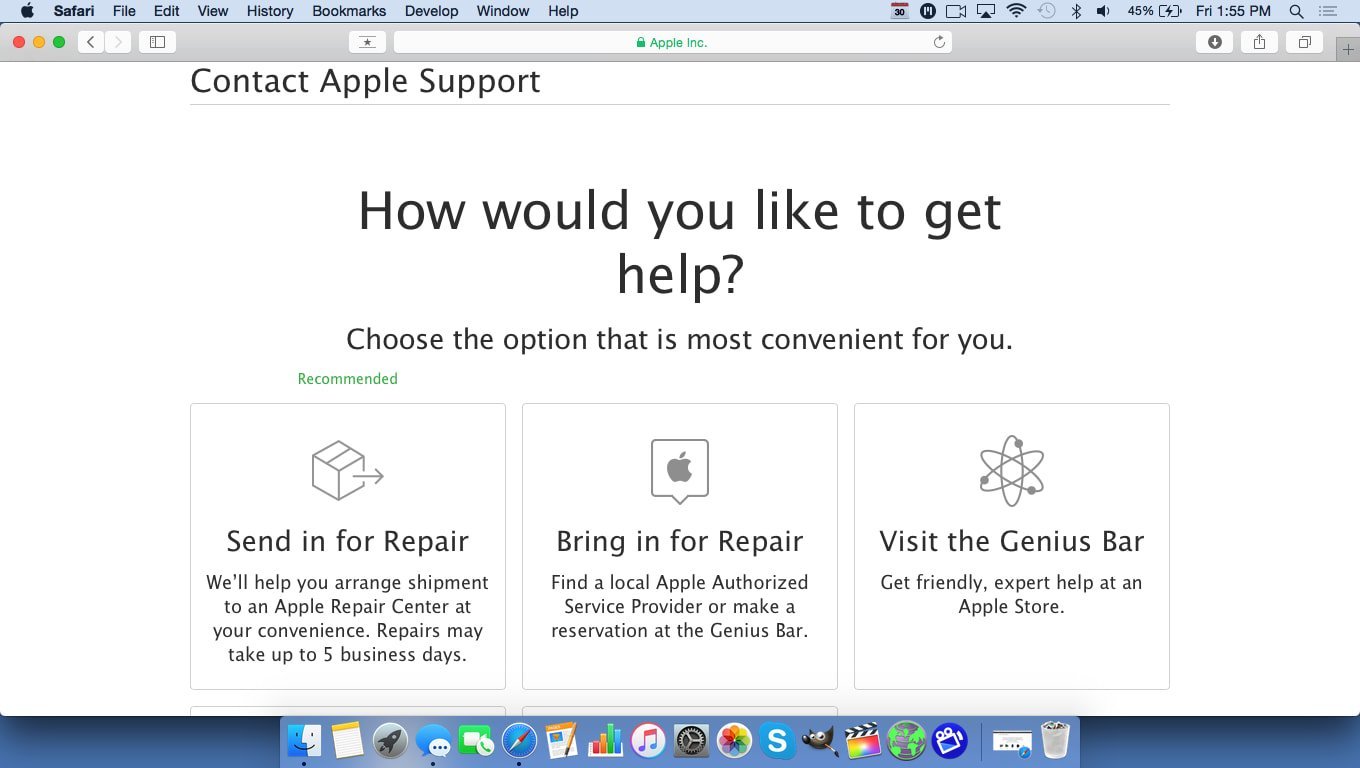
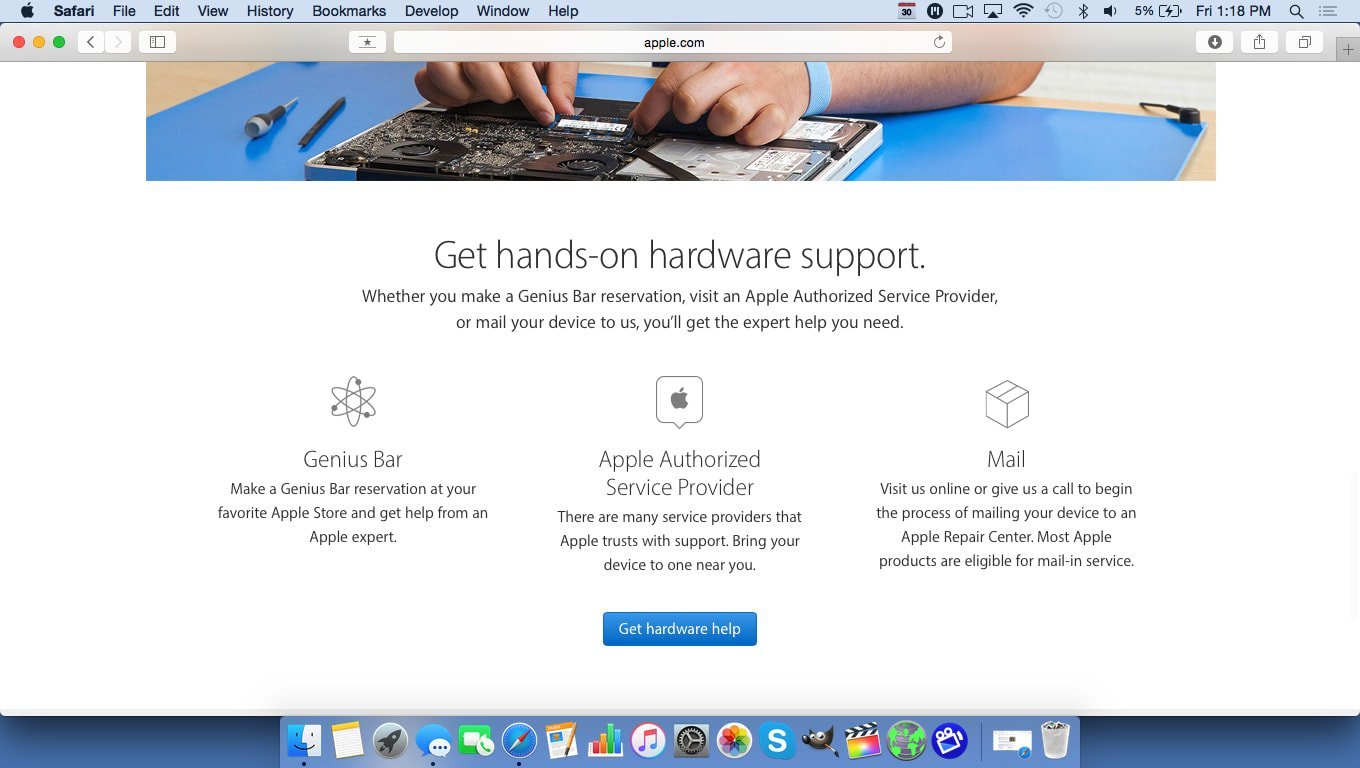
Apple repairs iPhones at the Genius Bar in Apple Stores and through their online mail-in repair service. Apple repairs are high-quality, but out-of-warranty repairs can be much more expensive than third-party solutions. If you're looking to save some money you're not covered by Apple's warranty, you may want to check out our other recommendations.
How Do I Repair My iPhone With Apple?
How To Repair Your iPhone With Apple's Mail-In Service
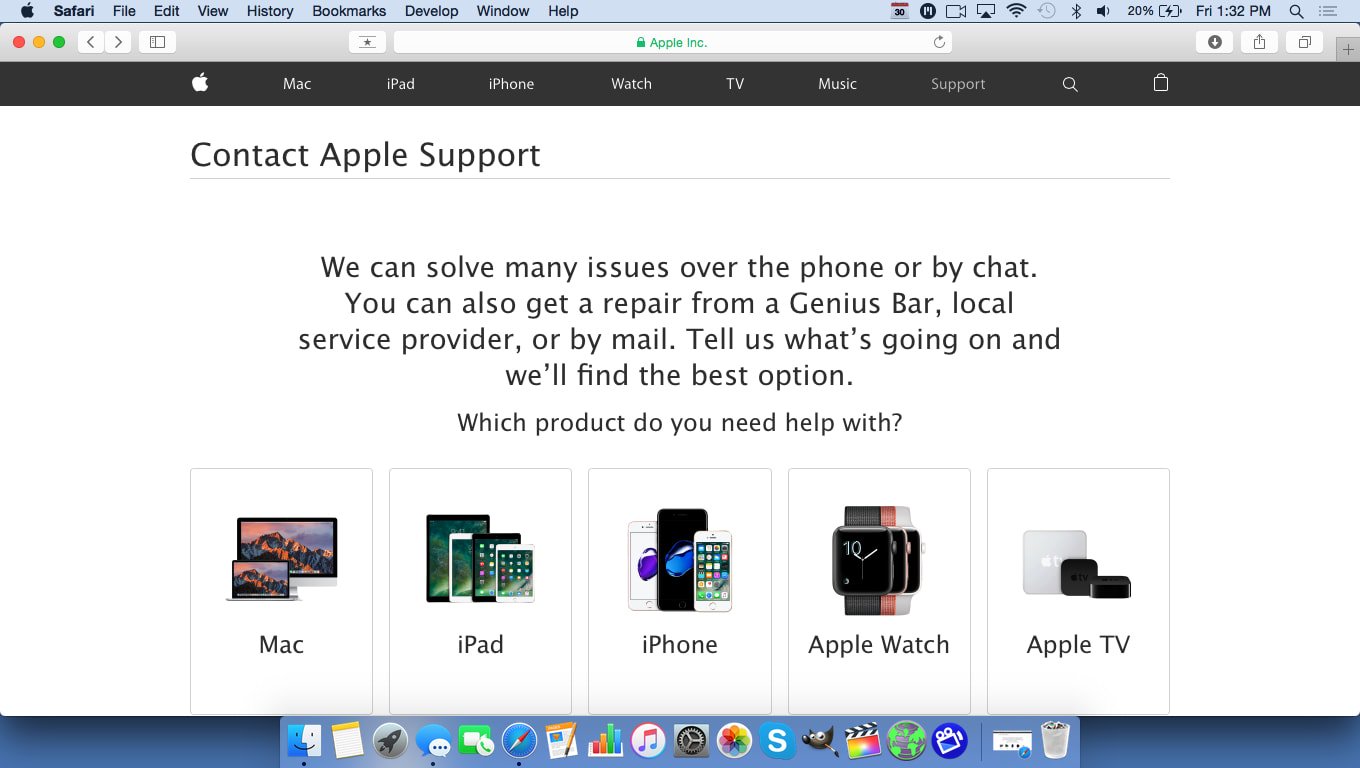
- Visit Apple's support website to begin the online mail-in repair process.
- Alternatively, call 1-800-MY-APPLE (1-800-692-7753) to set up a repair.
How To Repair Your iPhone At The Genius Bar Inside Your Local Apple Store
- Visit Apple's website to make a Genius Bar appointment before you go into the store. Apple Stores are extremely busy, and if you don't have an appointment, you may have to wait for hours or end up being turned away. (Editor's note: I'm a former Apple tech and we're not exaggerating — please, do yourself a favor and make an appointment first!)
- When you arrive, go to the Genius Bar to check in for your appointment.
- Genius Bar appointments always include free diagnosis. If you're under warranty, many repairs can be done on the spot, but it all depends upon which parts are in stock. If you're not under warranty, the Genius will give you a quote for the cost of a repair.
Applies To: iPhone 5,iPhone 5S,iPhone 5C,iPhone 6,iPhone 6 Plus,iPhone 6S,iPhone 6S Plus,iPhone SE,iPhone 7,iPhone 7 Plus,iPhone 8,iPhone 8 Plus,iPhone X,iPhone XS,iPhone XS Max,iPhone XR,iPhone 11,iPhone 11 Pro,iPhone 11 Pro Max,iPhone SE 2
View MoreUpgrade To A New Phone
There are a lot of reasons why you would want to consider upgrading to a new phone. The cost of repairing an old phone can get expensive quickly, especially if many parts are broken. That money could be better invested in a new cell phone.
New cell phones have a lot of great features too: faster processors, sharper displays, better cameras, longer-lasting batteries, and much more!
- Head to the our phone comparison tool.
- Use the filters to sort phones by brand, model, operating system, storage capacity, pricing, and more.
- Click on the phone's name to learn more about, or click on the # Plans button to pair it with a new cell phone plan.
Applies To: iPhone 5,iPhone 5S,iPhone 5C,iPhone 6,iPhone 6 Plus,iPhone 6S,iPhone 6S Plus,iPhone SE,iPhone 7,iPhone 7 Plus,iPhone 8,iPhone 8 Plus,iPhone X,iPhone XS,iPhone XS Max,iPhone XR,iPhone 11,iPhone 11 Pro,iPhone 11 Pro Max,iPhone SE 2
View MoreSay Cheese!
Your iPhone X camera is working again and you can finally use all of its amazing new settings. Now that you know why your iPhone X camera is not working, we hope you'll share this information on social media with your family and friends. Feel free to leave any questions or comments down below!
It’s just a terrible phone from a terrible company. Nothing on this X works well and this article is the same as every other, and what Apple will tell you. Wipe it out start from scratch and have the same problem and waste a lot of time proving you can’t fix any of its issues. after two years I’m going back to android it just works better because iOS is awful. I think I’d rather be followed by Google again at this point.
#3 Upgrade to the latest software version worked for me, thank you.
Why is my iPhone camera fine on regular view but blurry on selfie view? Also now blurry on Google Duo.